
![]()
Creating an ERC-20 token on the Ethereum blockchain is easier than you might think. These digital assets follow a standardized set of rules, the ERC-20 standard, which ensures seamless interactions within the Ethereum ecosystem. Whether used as digital currency, representing assets such as stocks or commodities, or membership in a club, ERC-20 tokens are versatile and powerful.
In this guide, we’ll walk you through the steps to create your own ERC-20 token, from understanding the basics to deploying it on the blockchain. Let’s dive in and start your journey into the world of Ethereum tokens.
What is an ERC-20 Token?
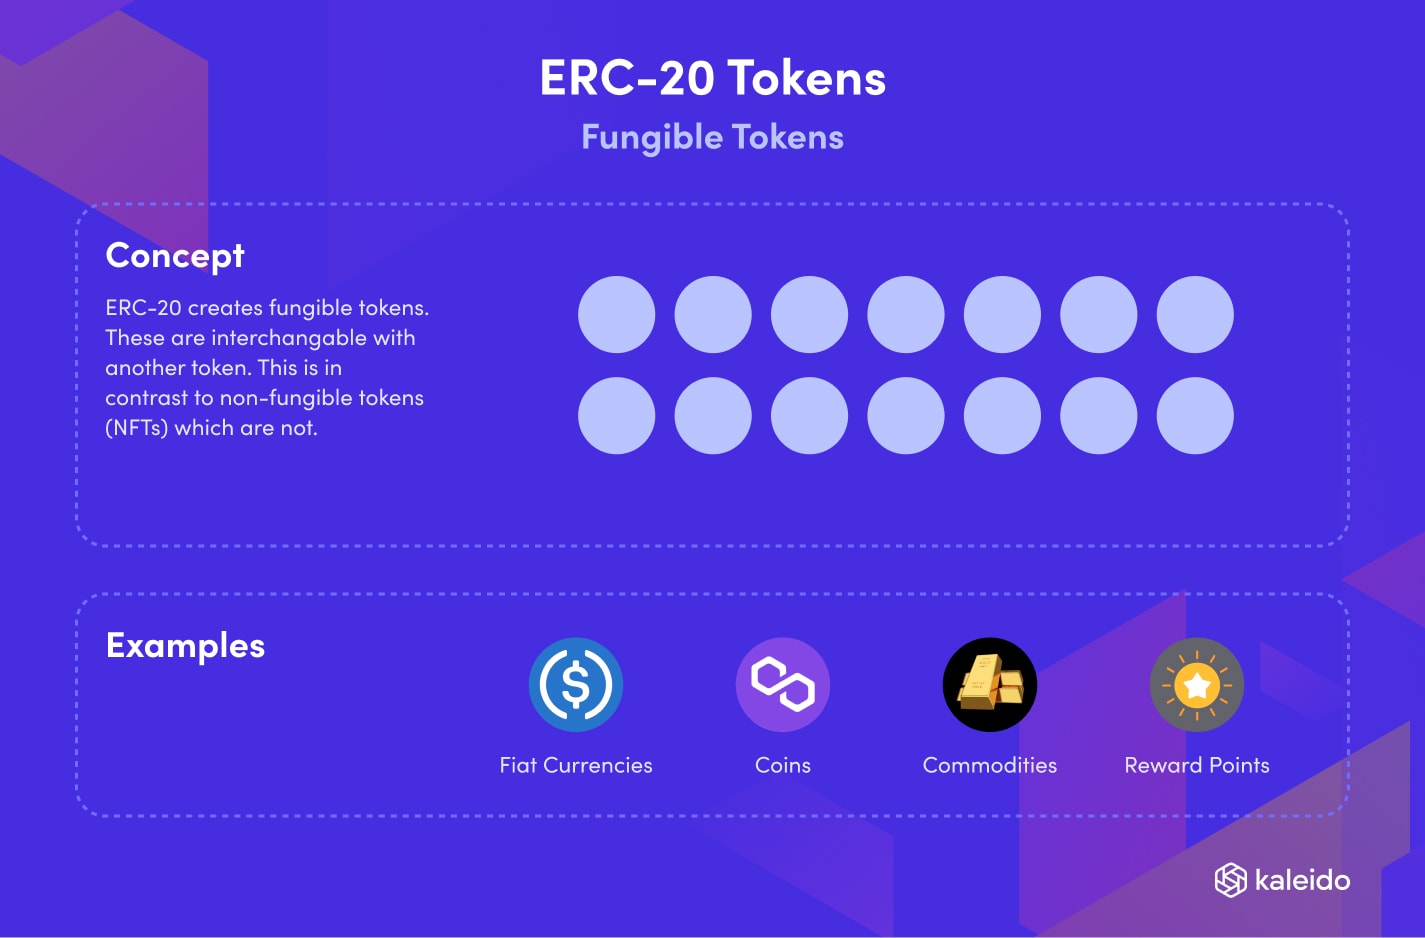
ERC-20, short for Ethereum Request for Comment 20, is the technical standard used in the Ethereum blockchain. This protocol establishes a uniform set of rules for all Ethereum-based tokens, simplifying their creation and integration.
ERC-20 tokens are similar to cryptocurrencies like Bitcoin, but operate on the Ethereum blockchain using gas for transaction fees. Before ERC-20, each token had a unique smart contract code, making wallet and exchange integration difficult. The ERC-20 standard facilitates token interactions, making it easy to access and exchange tokens efficiently.
ERC20 Token use cases
Enterprise companies use ERC-20 tokens for a variety of reasons, some of the most common being:
- Asset tokenization: ERC-20 tokens can be used to tokenize physical assets, such as real estate or art, to make them easily tradable and accessible to a wider range of investors.
- Smart contract functionality: ERC-20 tokens are built on the Ethereum blockchain, which allows for the creation of smart contracts. These smart contracts can be used to automate various business processes, such as supply chain management or voting systems.
- Creating loyalty and rewards programs: ERC-20 tokens can be used to create customer loyalty and rewards programs that can be used to drive repeat business and customer engagement.
- Fundraising: ERC-20 tokens can be used as digital currency to raise funds through Initial Coin Offerings (ICOs) or Security Token Offerings (STOs).
- Increasing efficiency and reducing costs: ERC-20 tokens can be used to streamline financial transactions, reduce administrative costs and increase the speed of money transfers.
- Creating decentralized applications: ERC-20 tokens can be used to create decentralized applications (dApps), which can be used for various purposes such as creating decentralized exchanges, voting systems, and more.
Making an ERC-20 token isn’t particularly difficult, but it traditionally required a certain level of technical knowledge and understanding of blockchain. Developers can use a token generation platform, write their own smart contracts, or outsource to a team of developers who specialize in tokenization.
The Kaleido platform made this process radically different, easier and faster to implement.
Create an ERC20 Token on Kaleido
Step 1: Create a Kaleido account
If you don’t already have one, sign up for a Kaleido account here. Create an account and password and you’re all set. NFTs can be created with any Kaleido plan, including the entry level (free)!
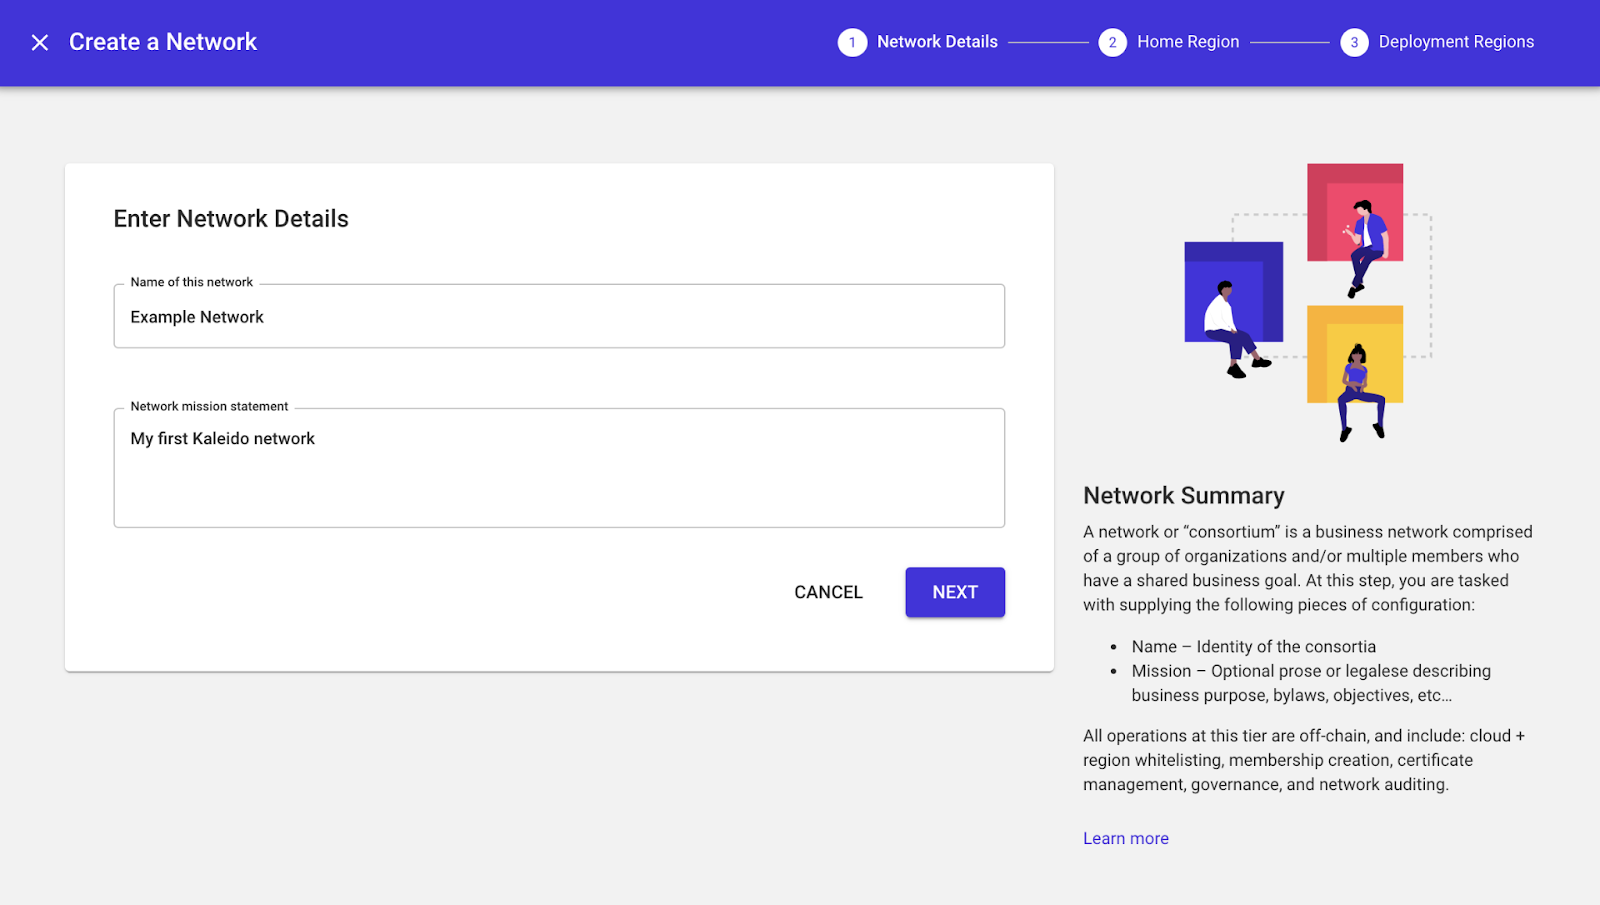
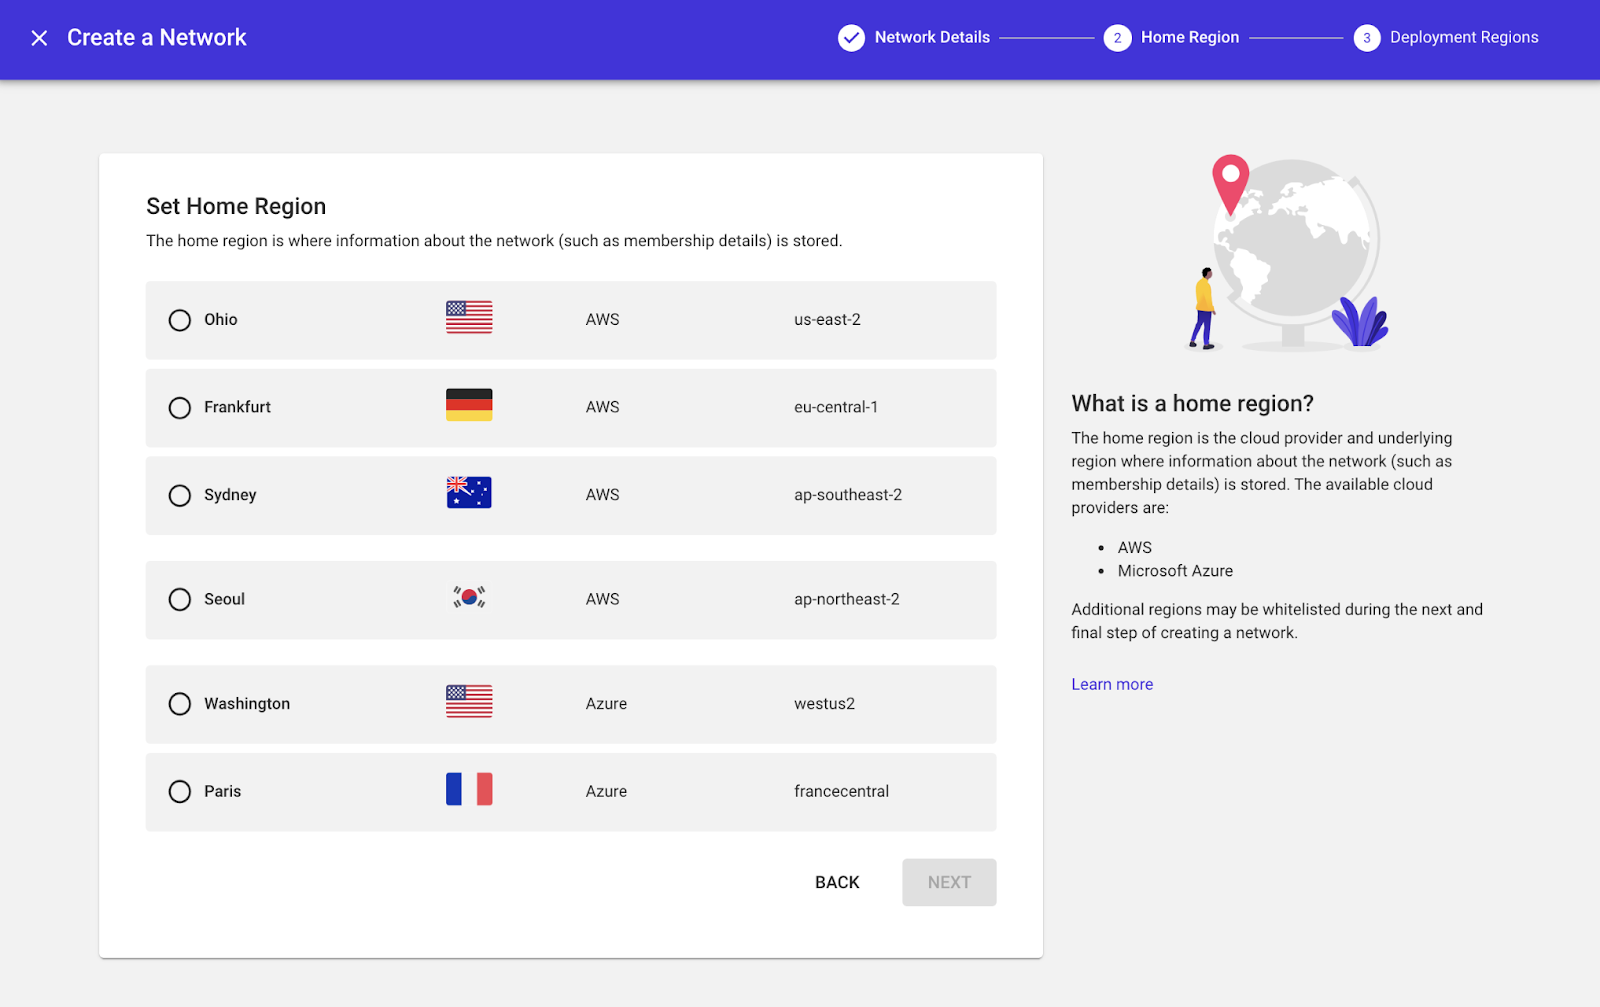
Step 2: Create a blockchain network
First, create a blockchain network. You will need to name your network and select deployment regions. This is where your resources will be hosted and there are several options for AWS and Microsoft Azure.
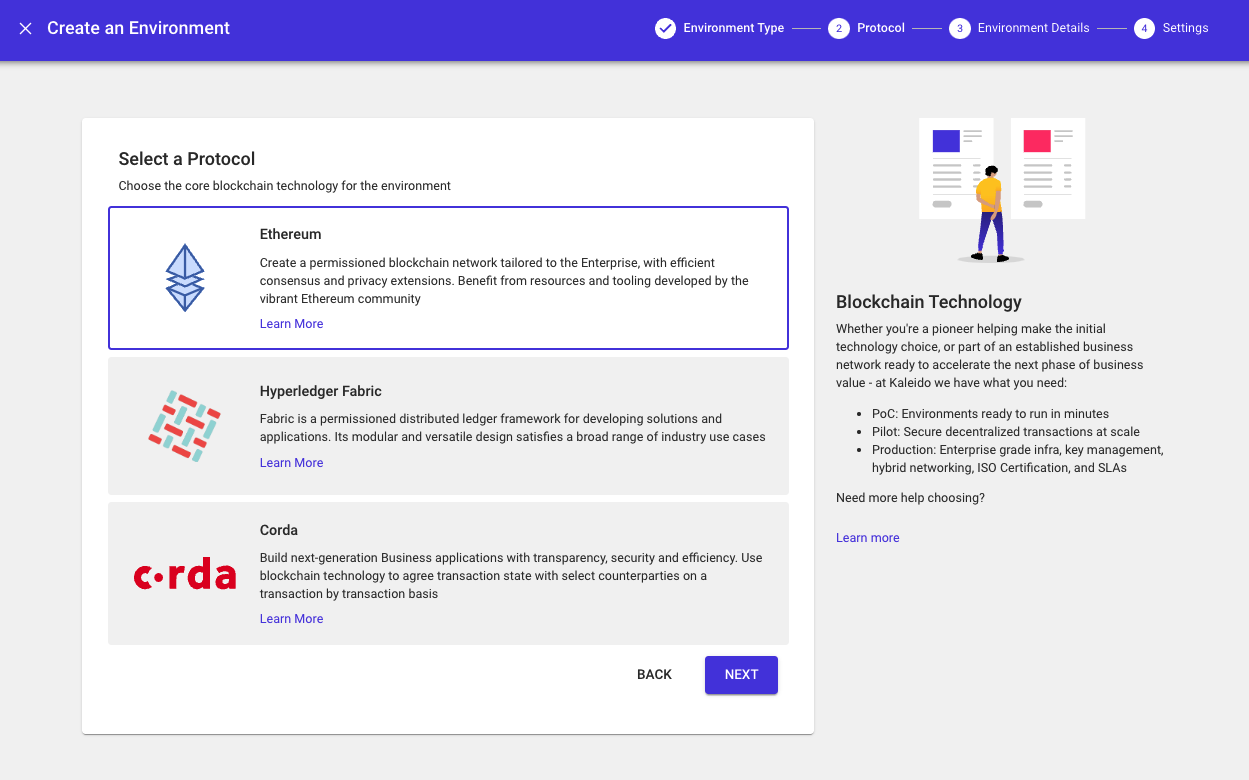
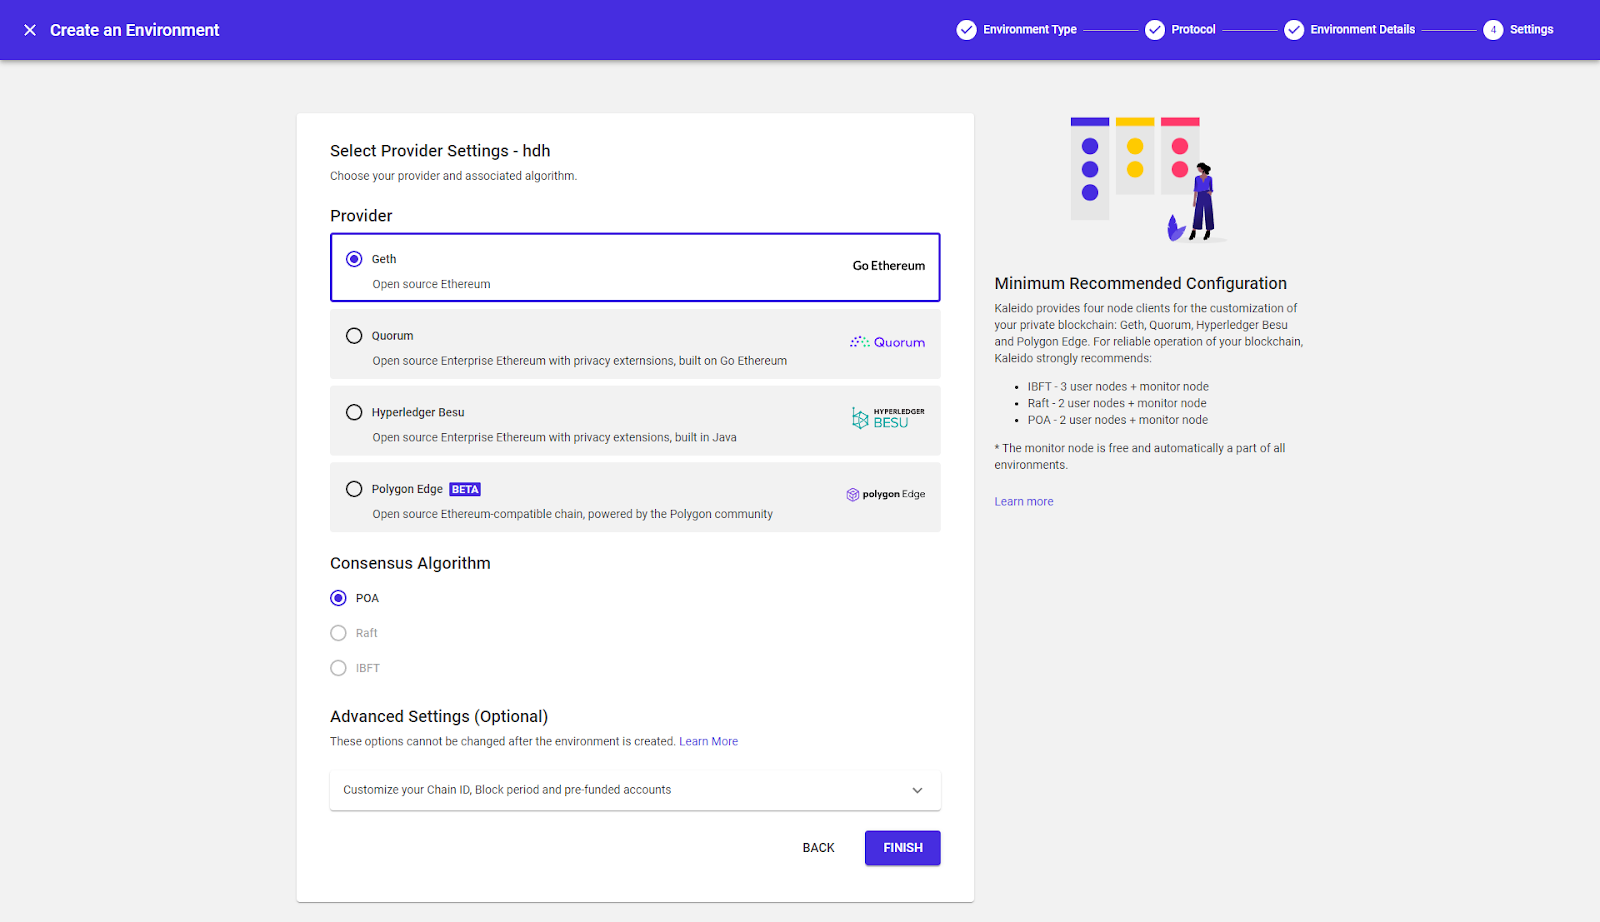
After creating your network you will need to create an environment. There are options for different protocols, however, to make an ERC-20 token, make sure you create an “Ethereum”. You will also need to select a provider.
For our purposes either will do, but if you’re curious about the differences, here’s a technical overview.
,
,
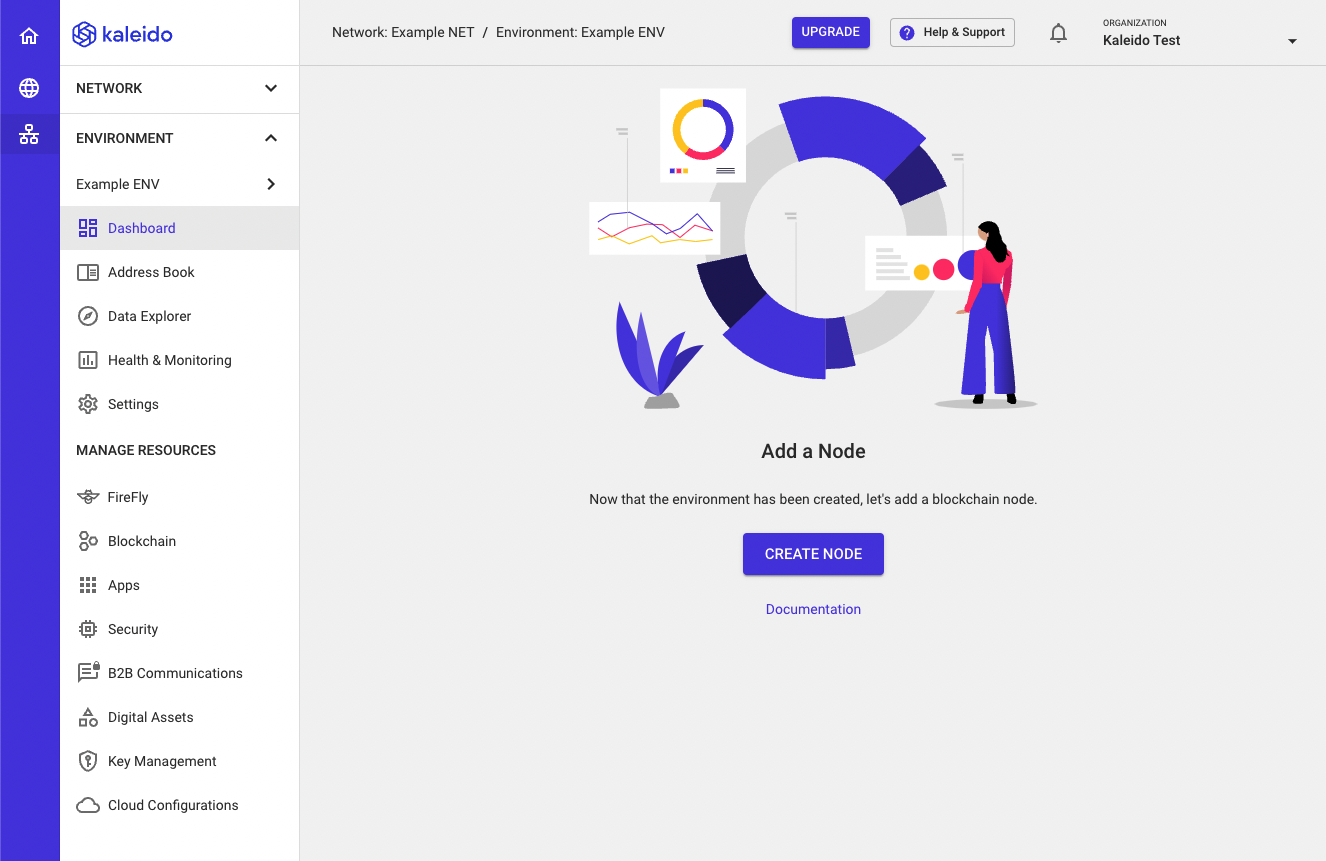
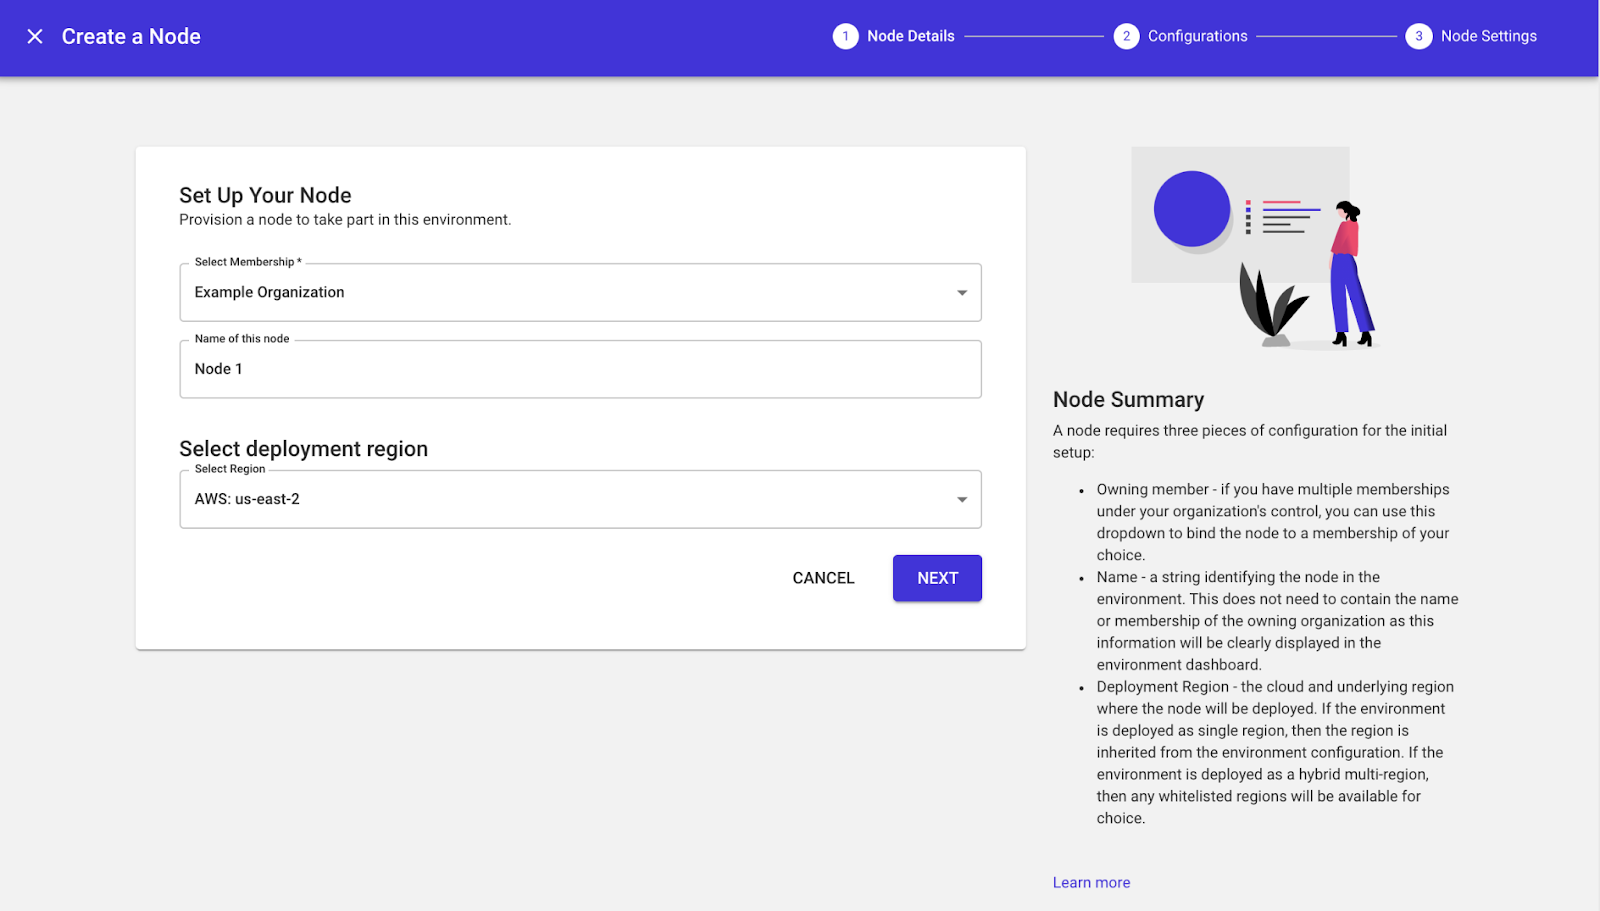
You’re almost there. After creating your environment, configure a node and leave the default settings of “small” and “signer” in the last panel.
,
,
Step 3: Create the token pool
Make sure your node has finished initializing and the status is Started. This is important because the node must be ready to be used as a signing account.
,

,
Go to the “digital assets” selection in the left panel and click on “tokens”. Select the Signing Account as the node you created in the previous step to deploy the token contract to the blockchain and generate the token using our Token Factory. Select KaleidoERC20MintableBurable as the template to use. Other ERC20 templates are fine too, but for this example we want the token to be painful and burnable.
,
,
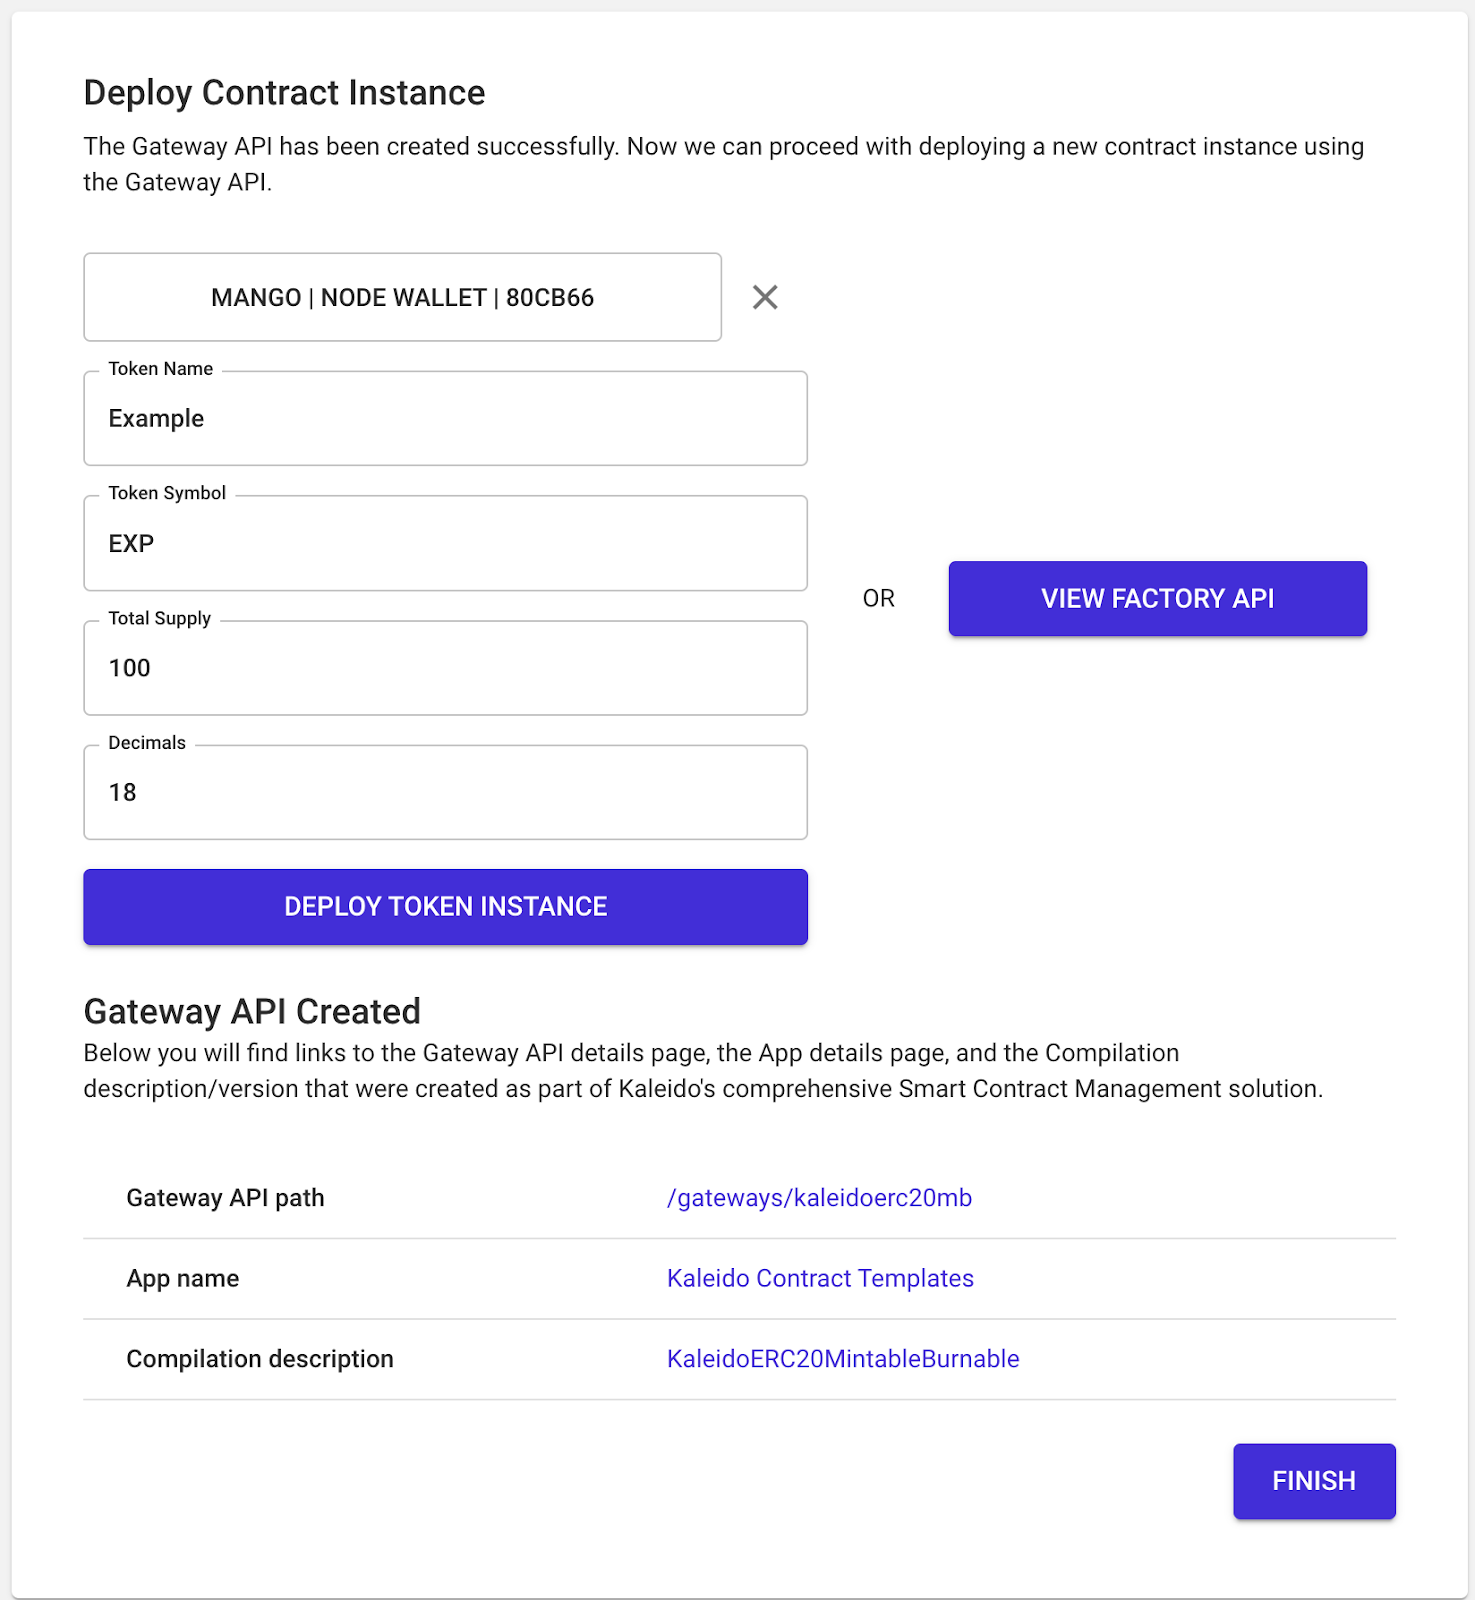
Provide the name and logo along with a supply of your tokens. Since the contract is painful, you can always make more tokens to increase the supply. For tens, 18 is the default number used by Ether and most ERC20 token contracts. Then click “Deploy Token Instance” and “Finish”.
Go back to the Tokens section and you should see the token deployed.
,

,
Step 4: ERC20 transactions
Now that you have deployed an ERC20 contract, the next step is to mine your token. Go to the left navigation and click on “tokens”. You should now see the NFT you created. In the top right, click “select signing account” and select the same account you used to create your ERC20 contract.
,

,
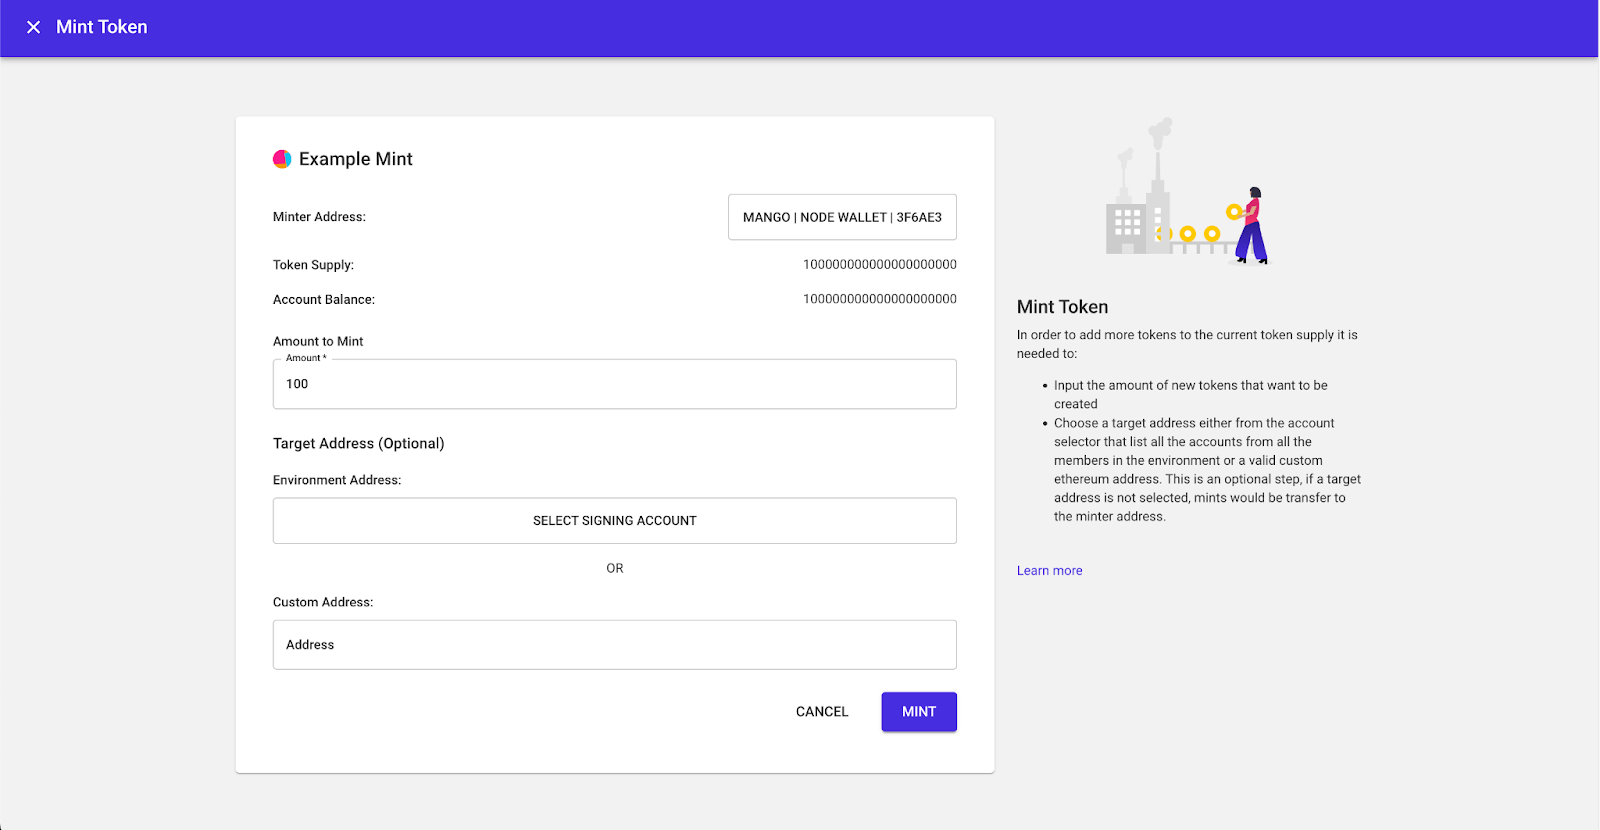
You should now see options to transfer, mine or burn your token. For example, click on “Mint” and enter a value of 100.
,
After clicking Mint, the address balance should increase by 100.
,
,
You can also check chain transactions by going to the Data Browser in the left navigation. Clicking on the Block Explorer will show you the most recent transactions that have occurred and will include details such as hash, block number, timestamp, and more.
,

,
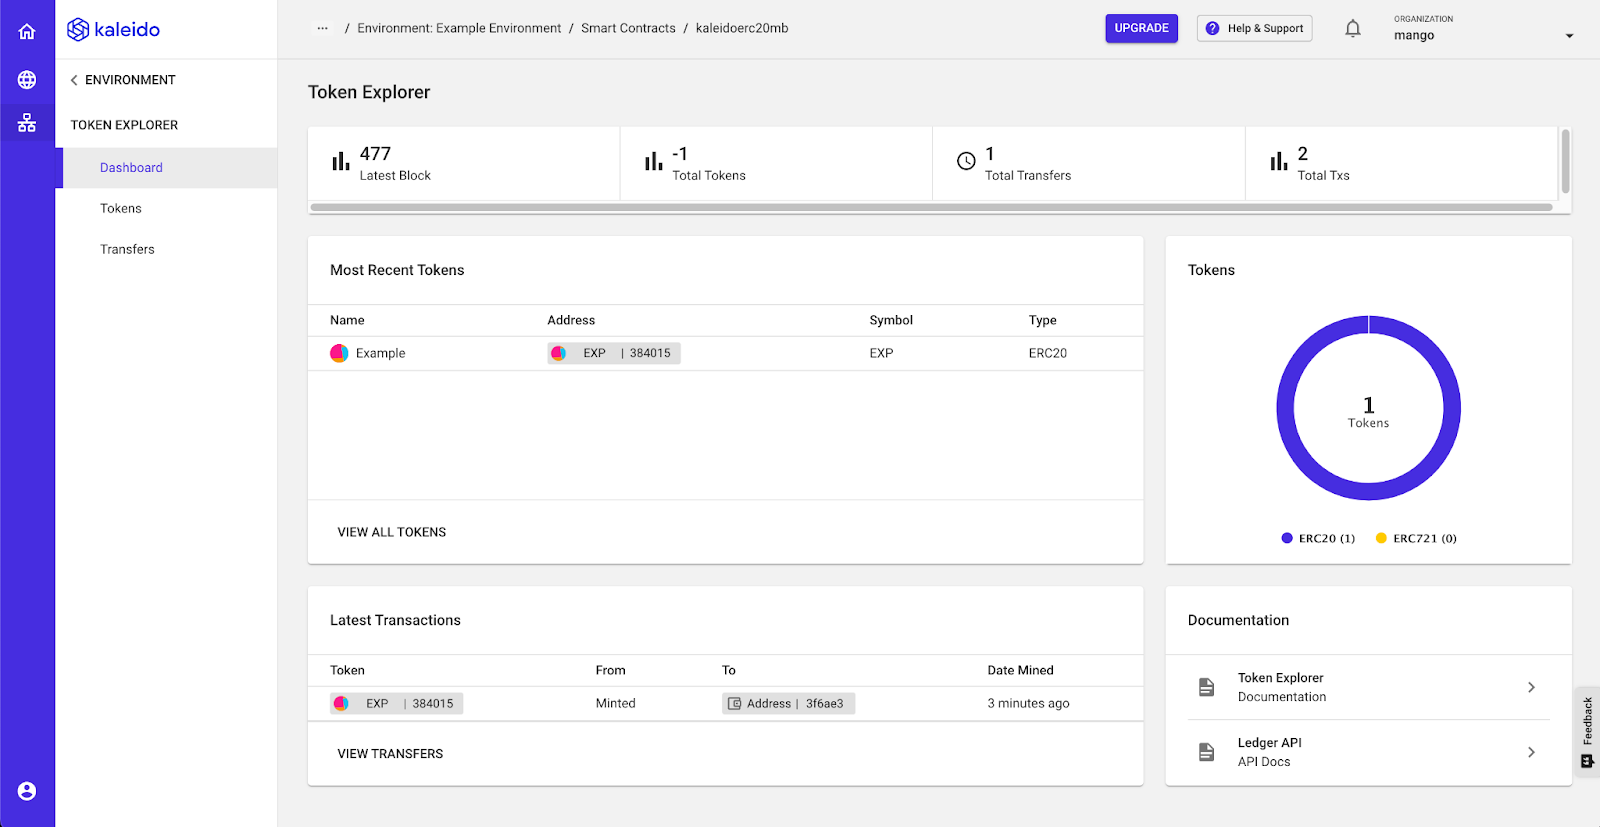
The Token Explorer will also show a similar view, but will only show token transactions.
,
,
Step 5: Transfer Tokens
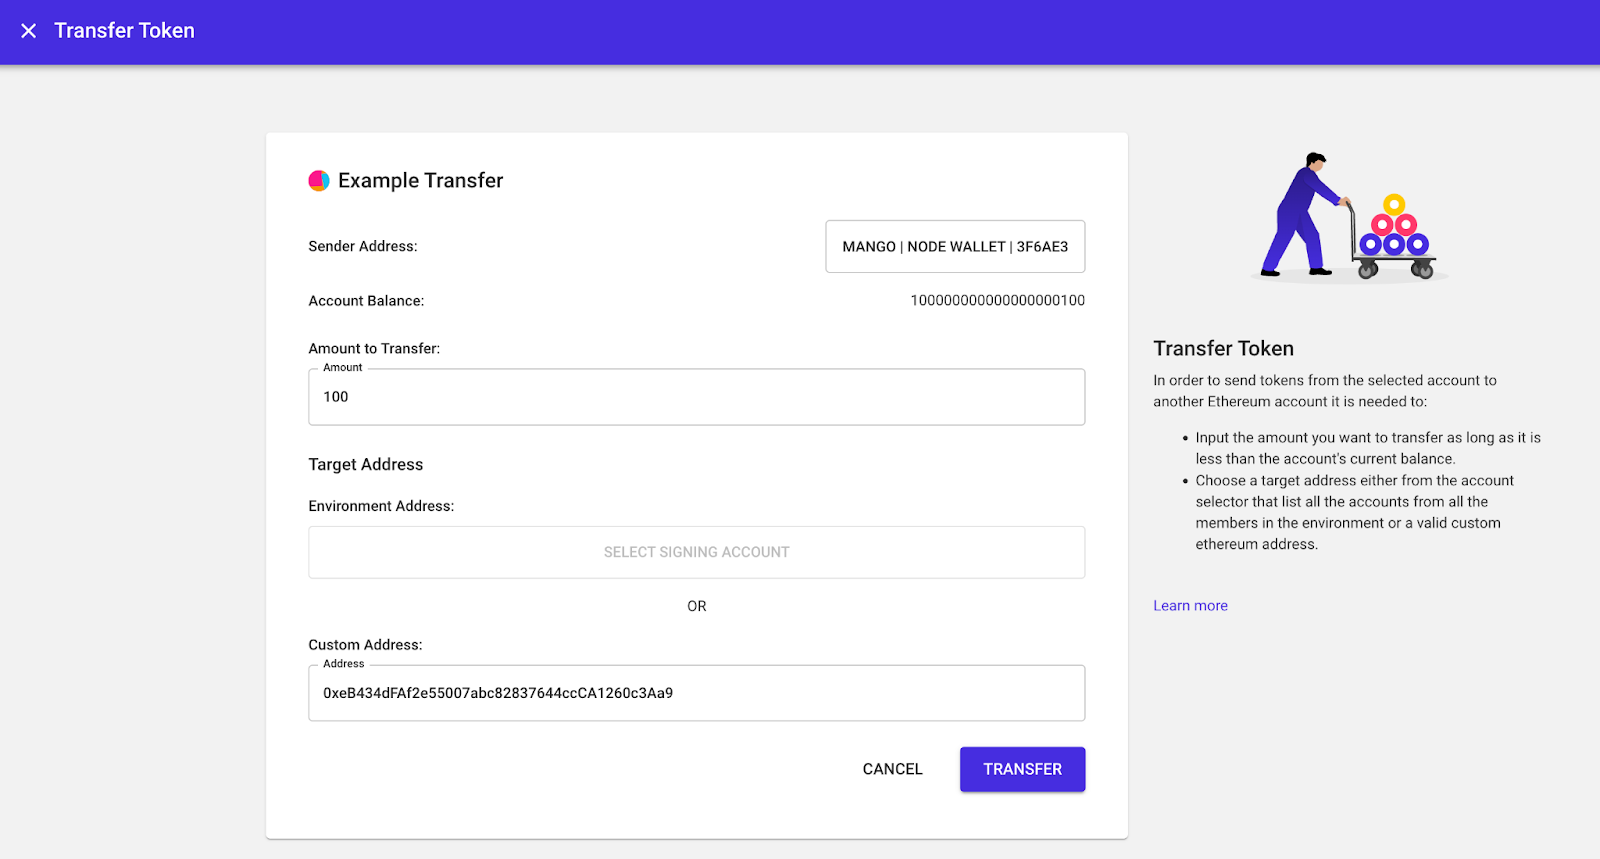
Return to the Tokens section and select your token. Select “transfer” and you should see the following screen.
,
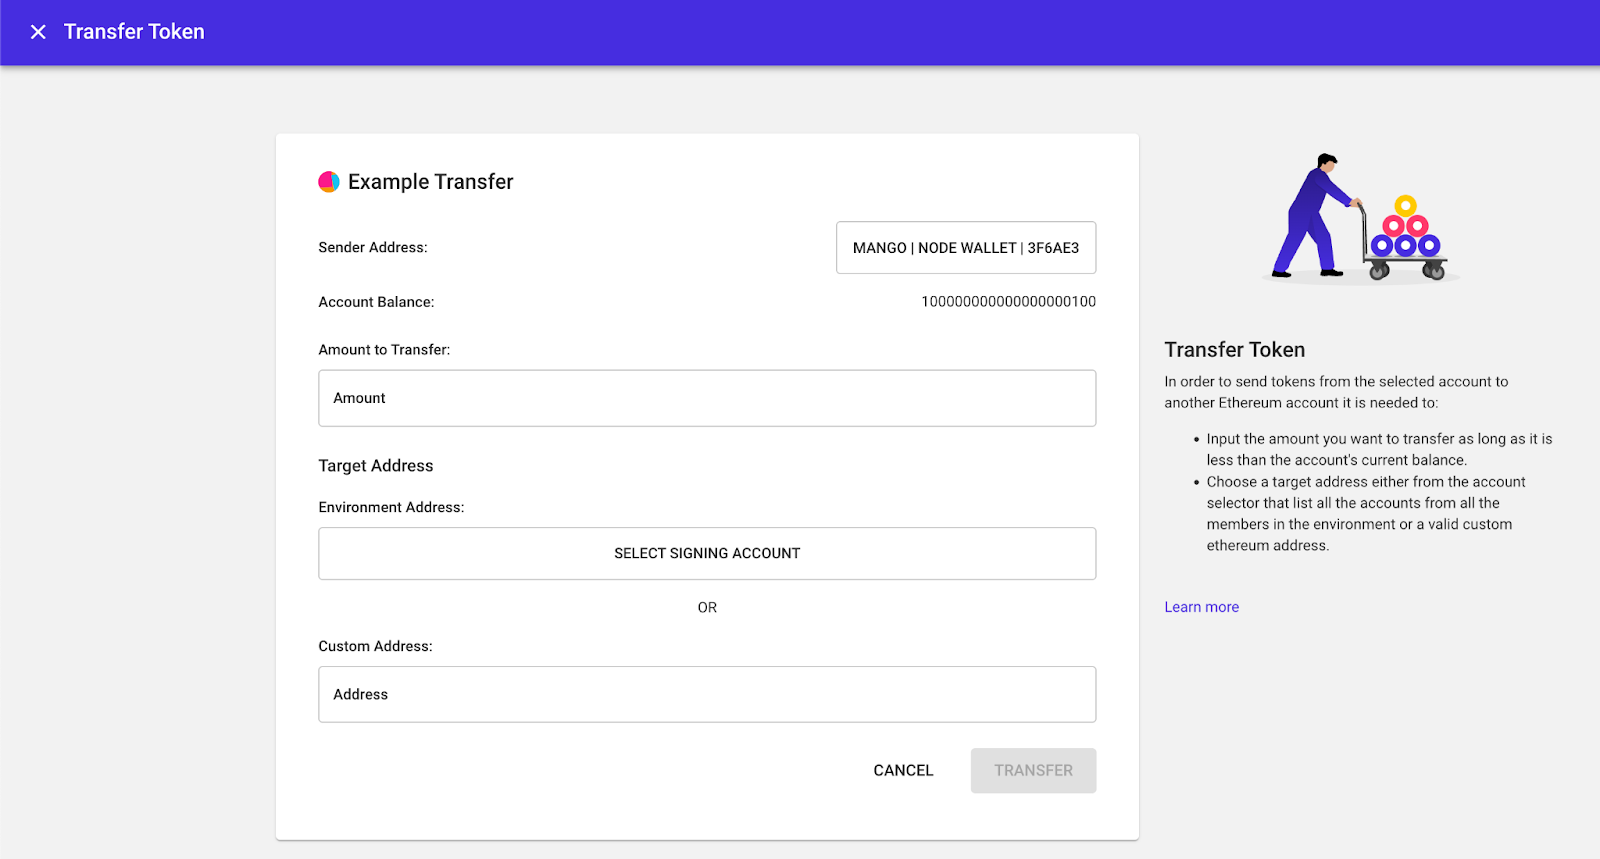
,
You can provide an address from your blockchain environment or a custom address. To get another address in your blockchain environment, simply create a second node. In this tutorial we will show you how to get your token into Metamask.
If you haven’t set up a Metamask wallet before, check out this guide to create one.
In your Metamask account, click on the networks dropdown and click “Add Network”.
,
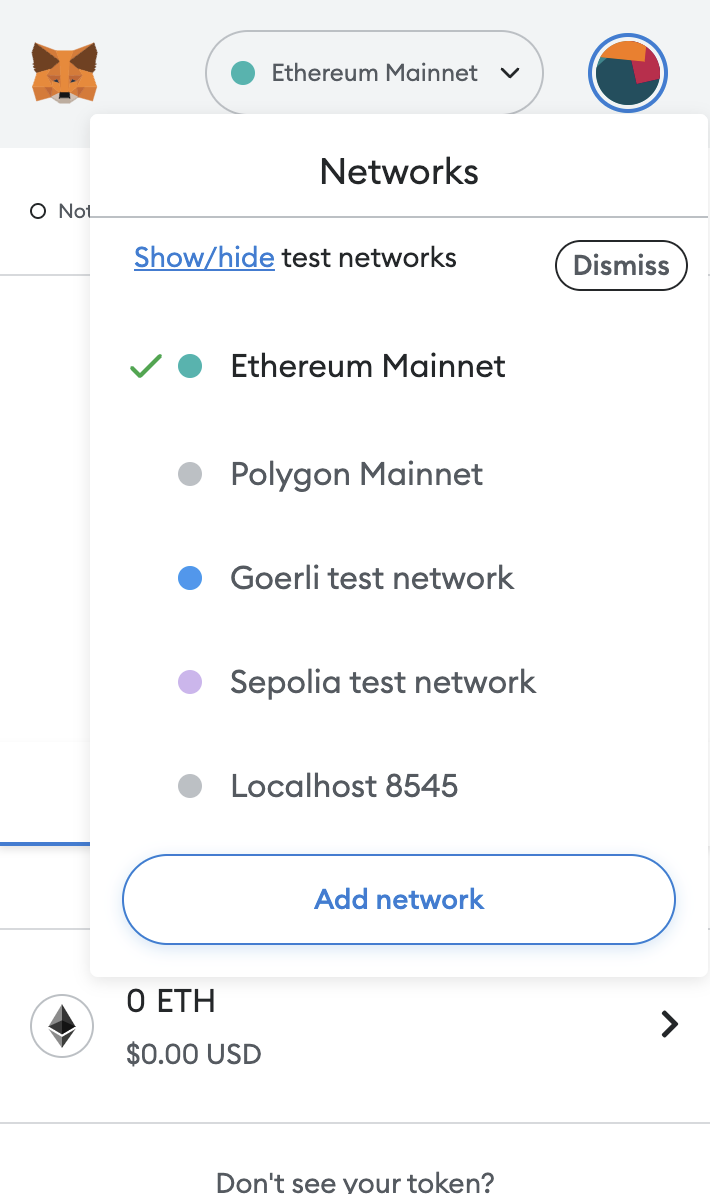
,
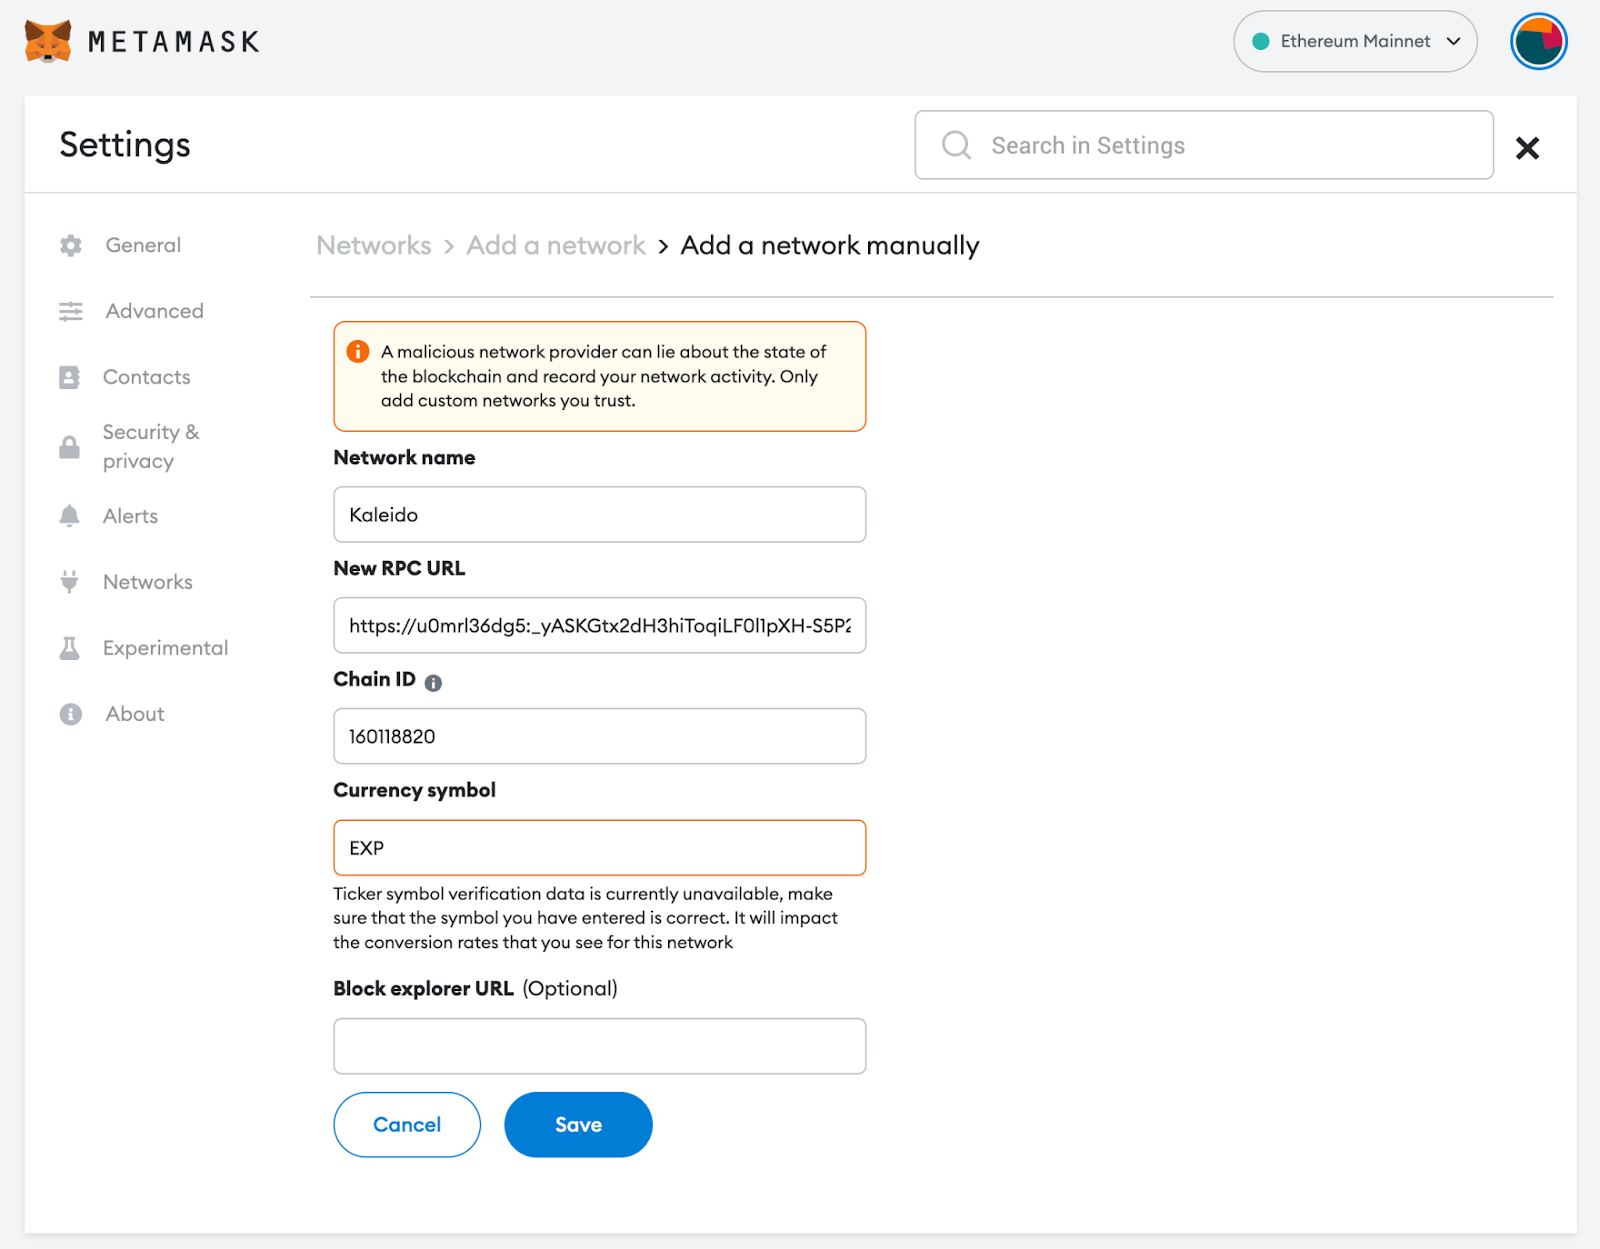
This will take you to your Metamask settings screen where you will need to “Add Network Manually”.
,
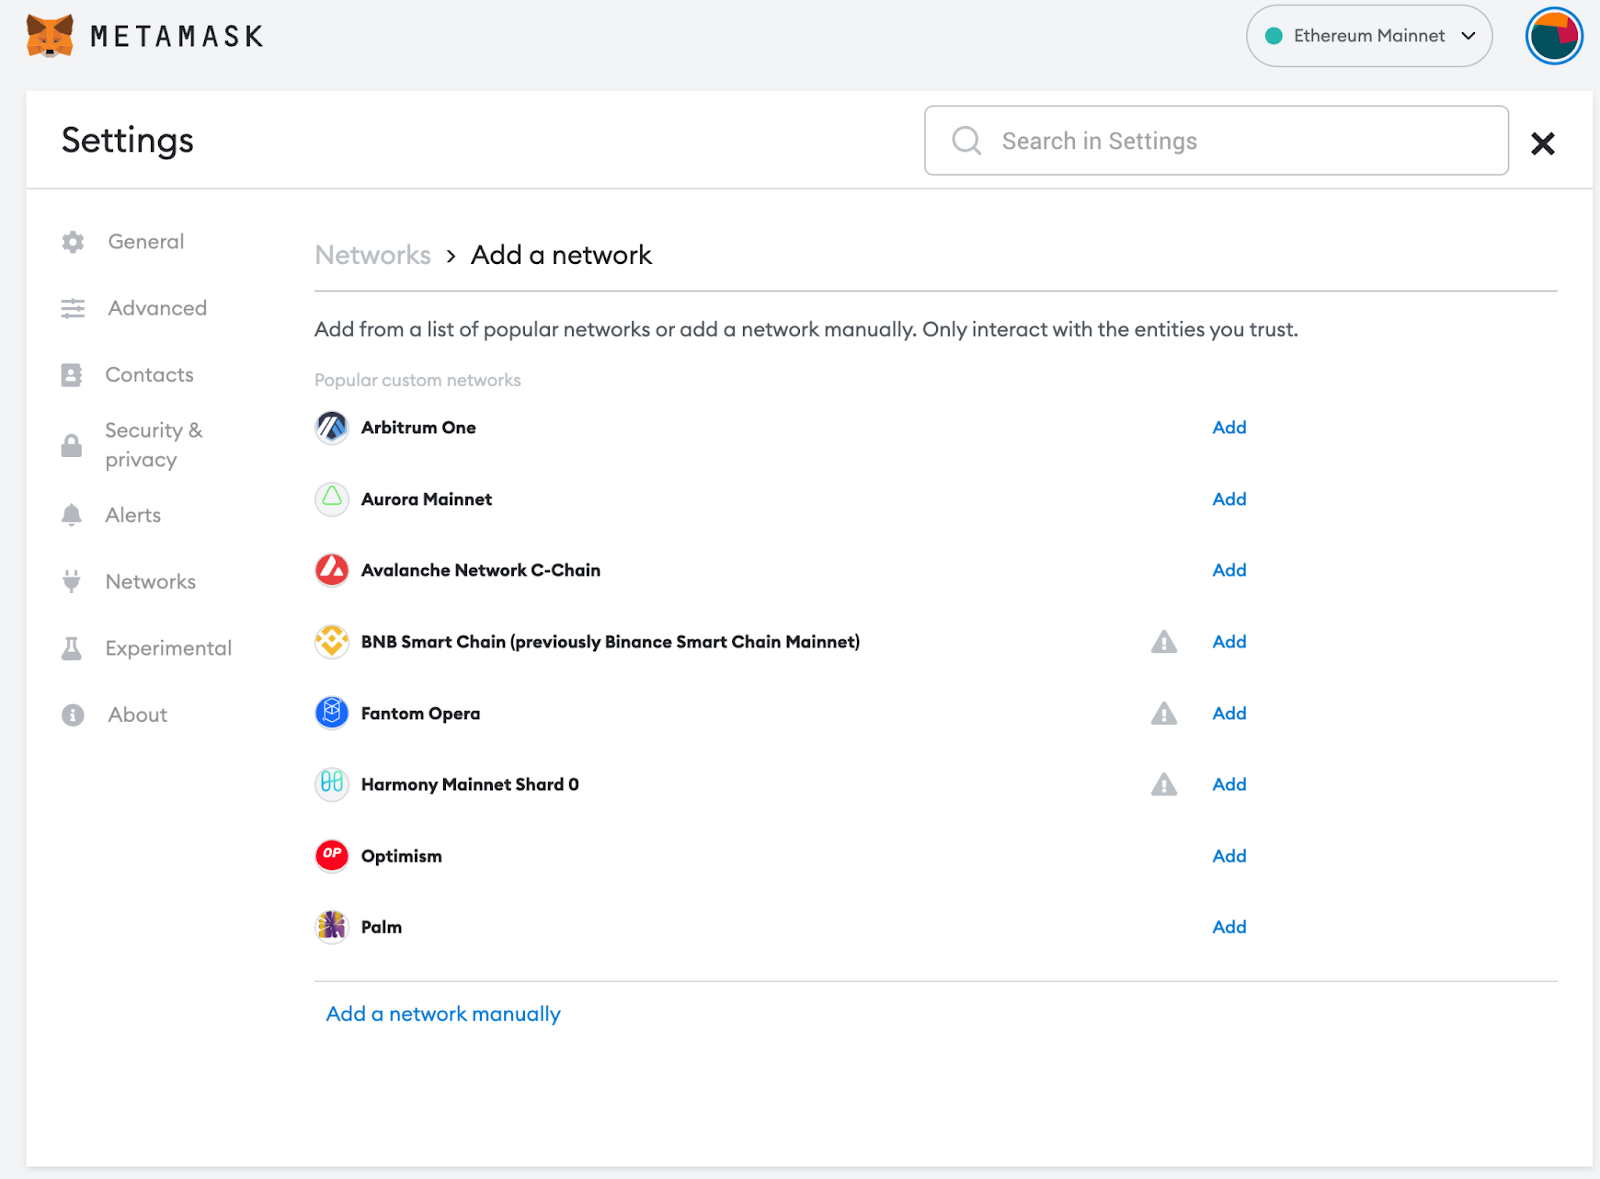
,
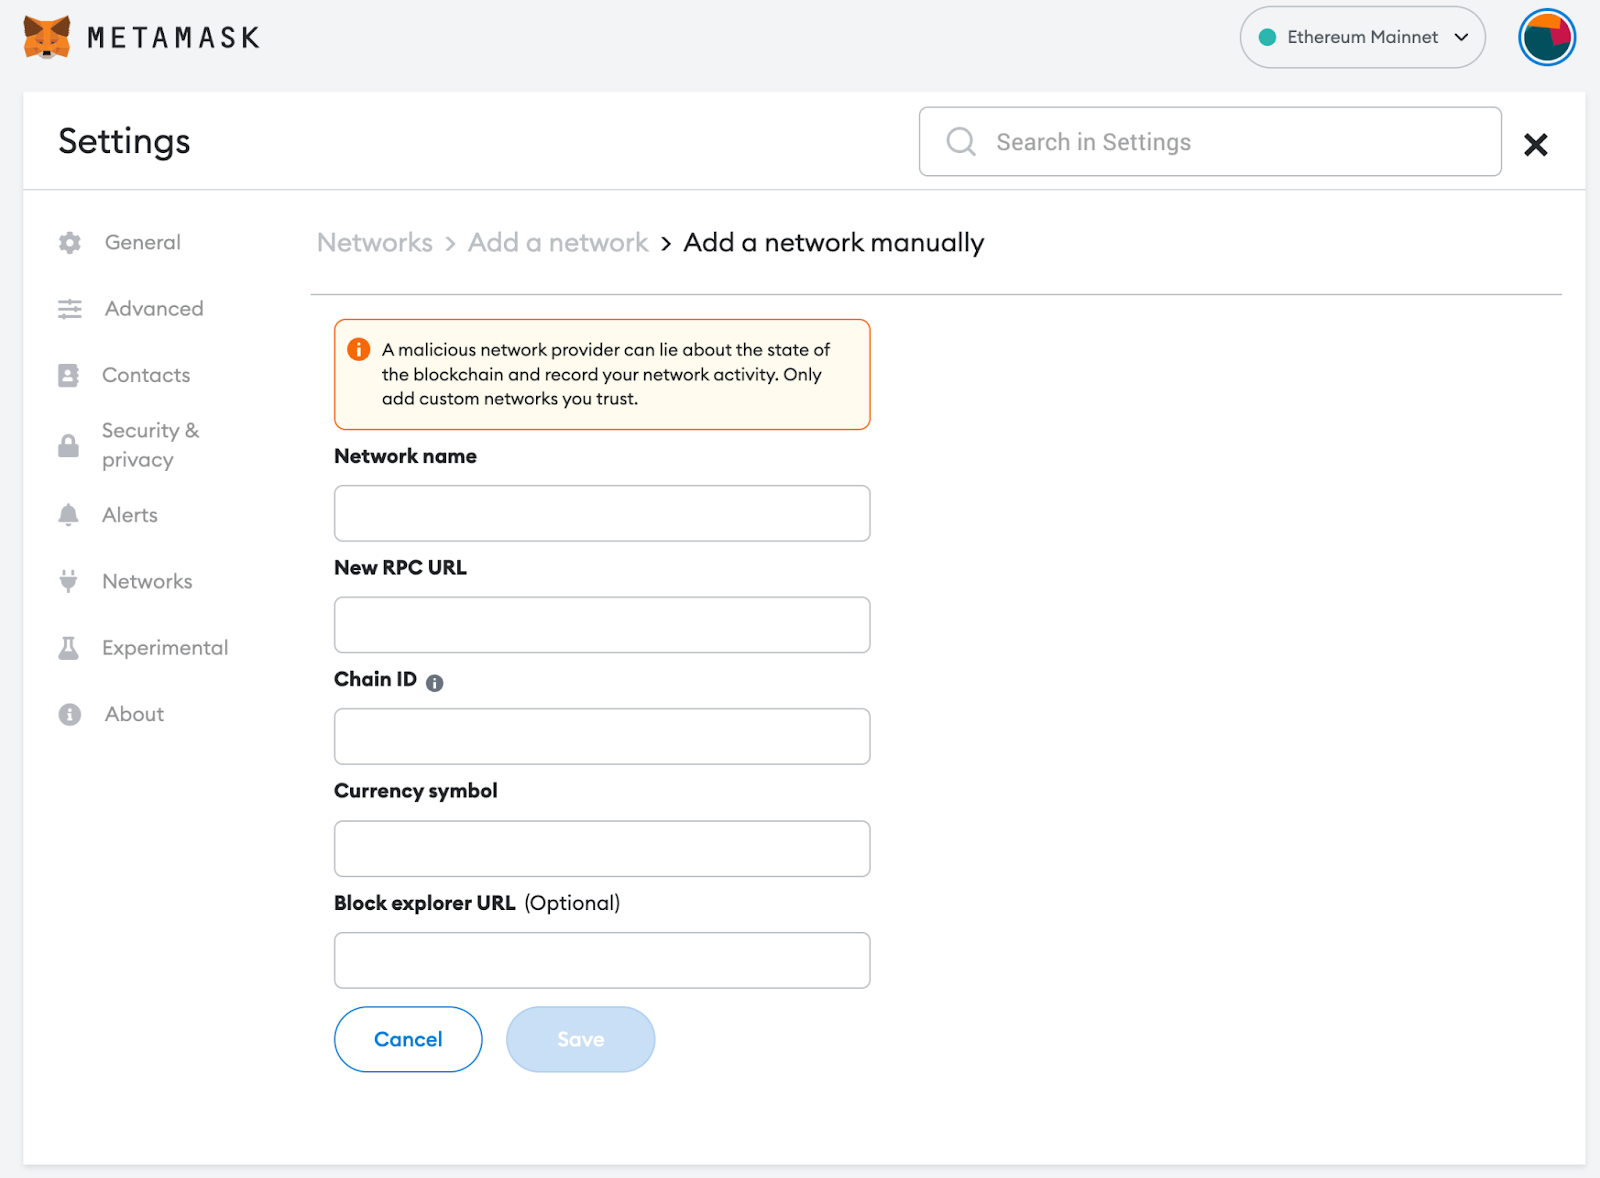
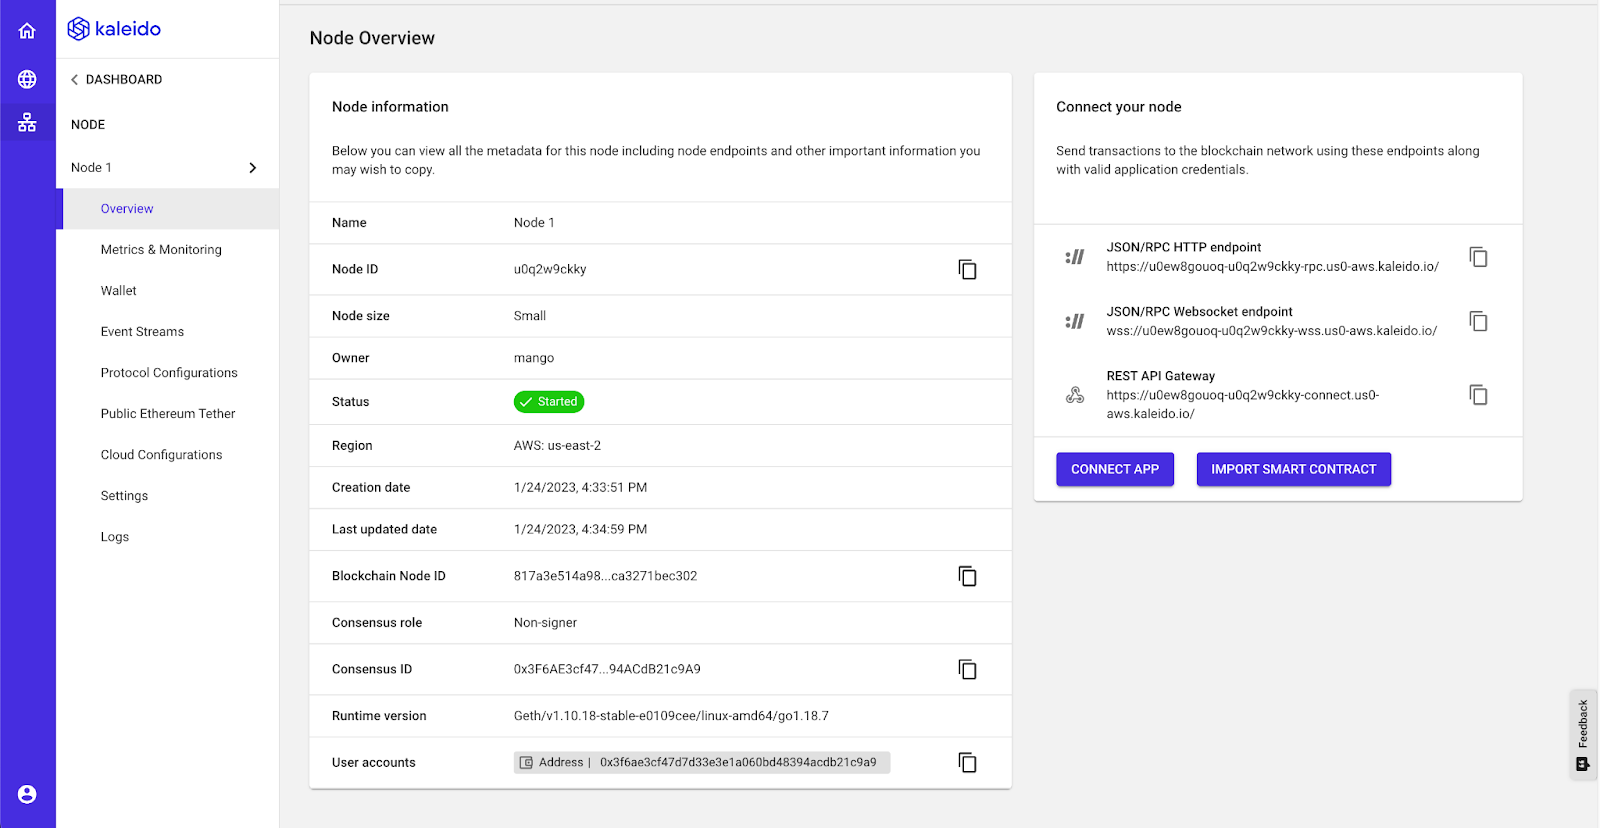
For the network name, you can name it anything. To get the RPC URL and Chain ID, go back to your Kaleido console and go to the Blockchain section. In the Blockchain panel select “View Node” for your node.
,
,
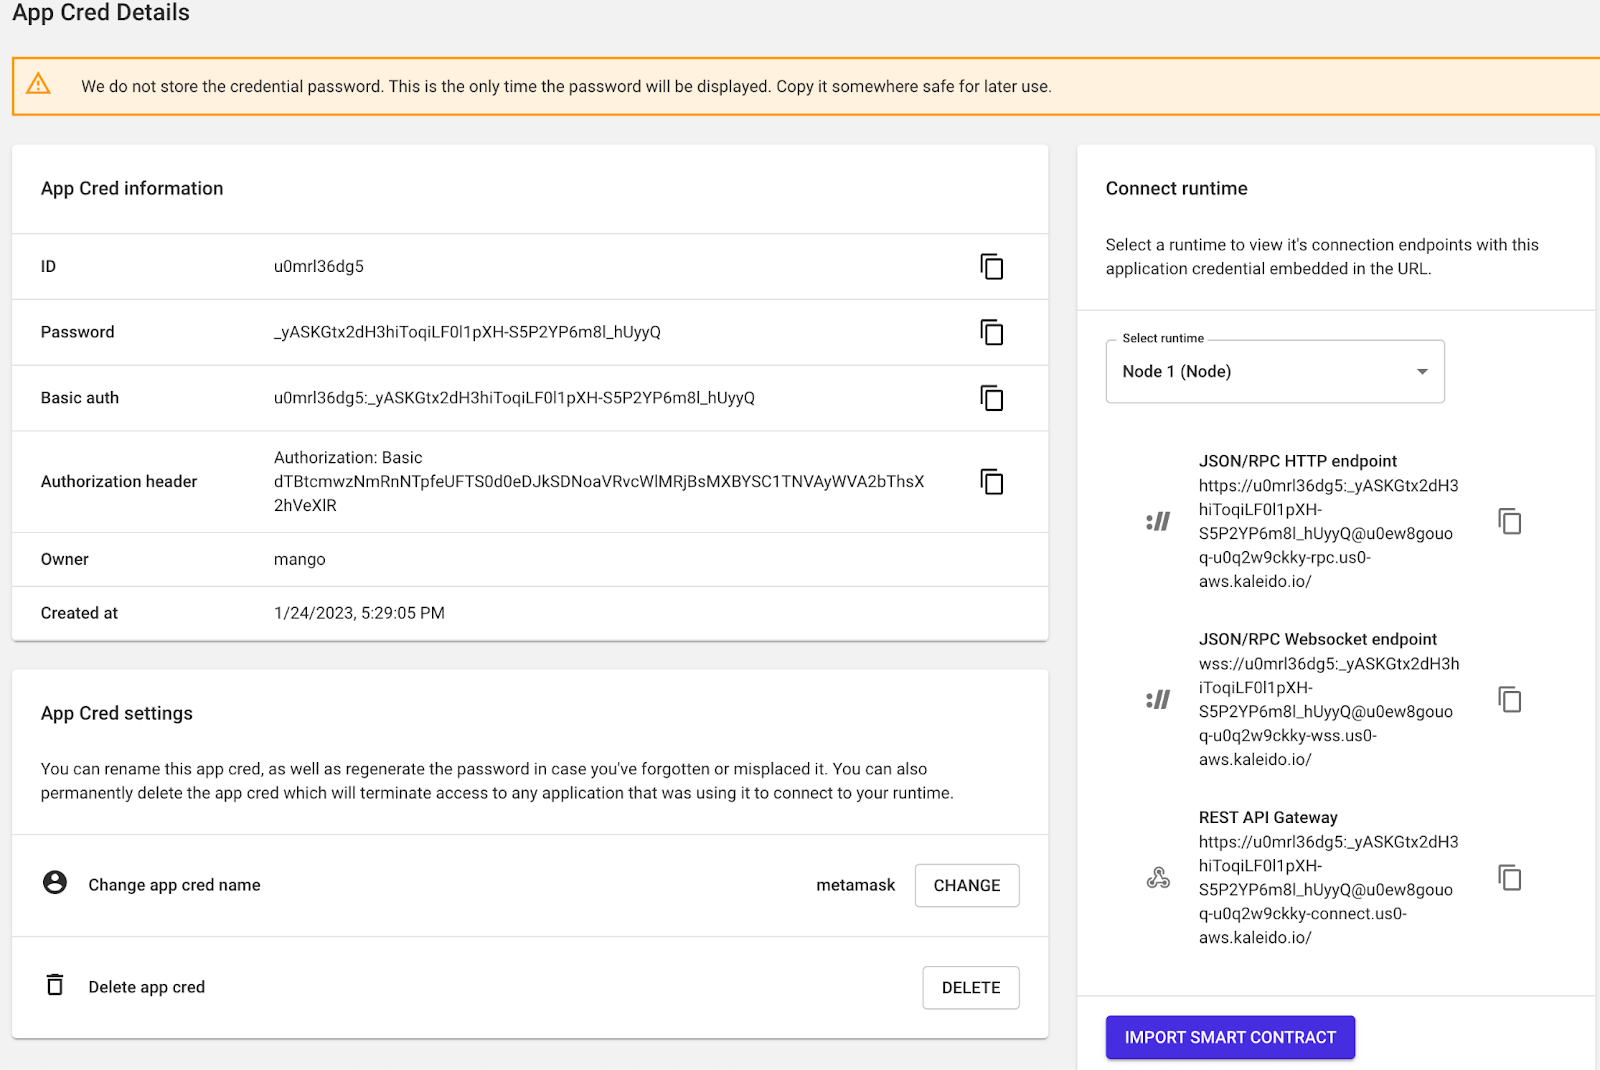
Then click Connect App and create a new app credit called “metamask”. The RPC URL will be listed in the JSON/RPC HTTP endpoint. Copy this value into Metamask.
,
,
To get your channel ID, click Settings. Your channel ID will be in the Environment information.
,

,
After getting all the information, click save metamask settings.
,
,
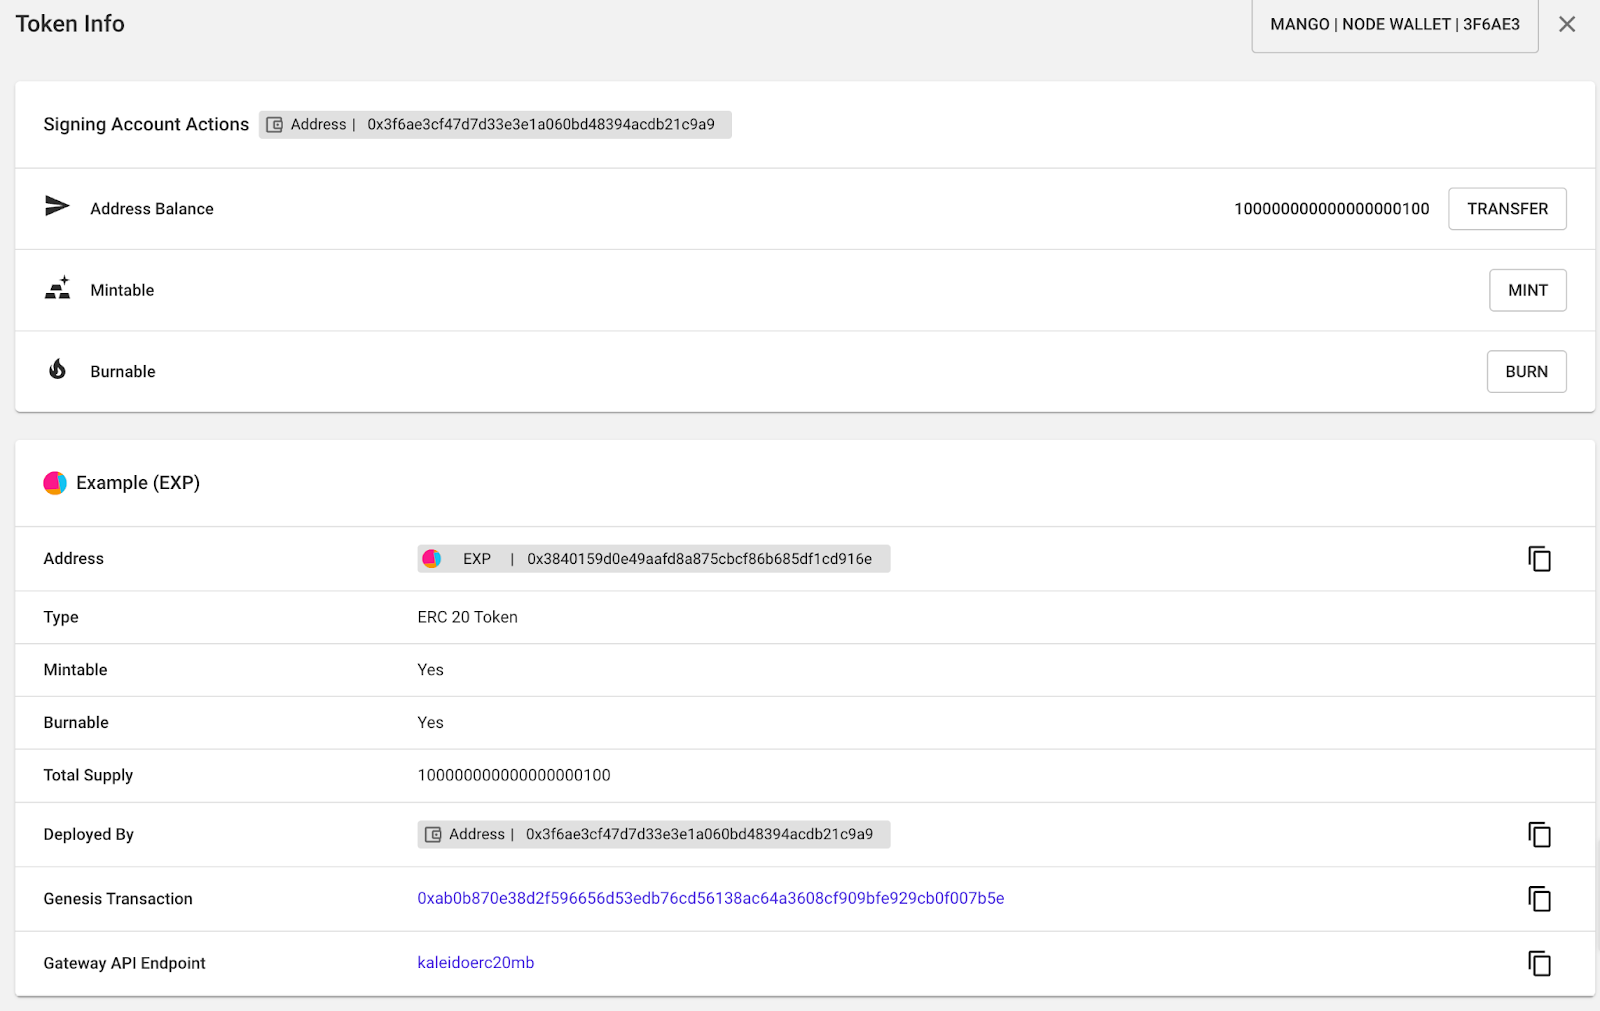
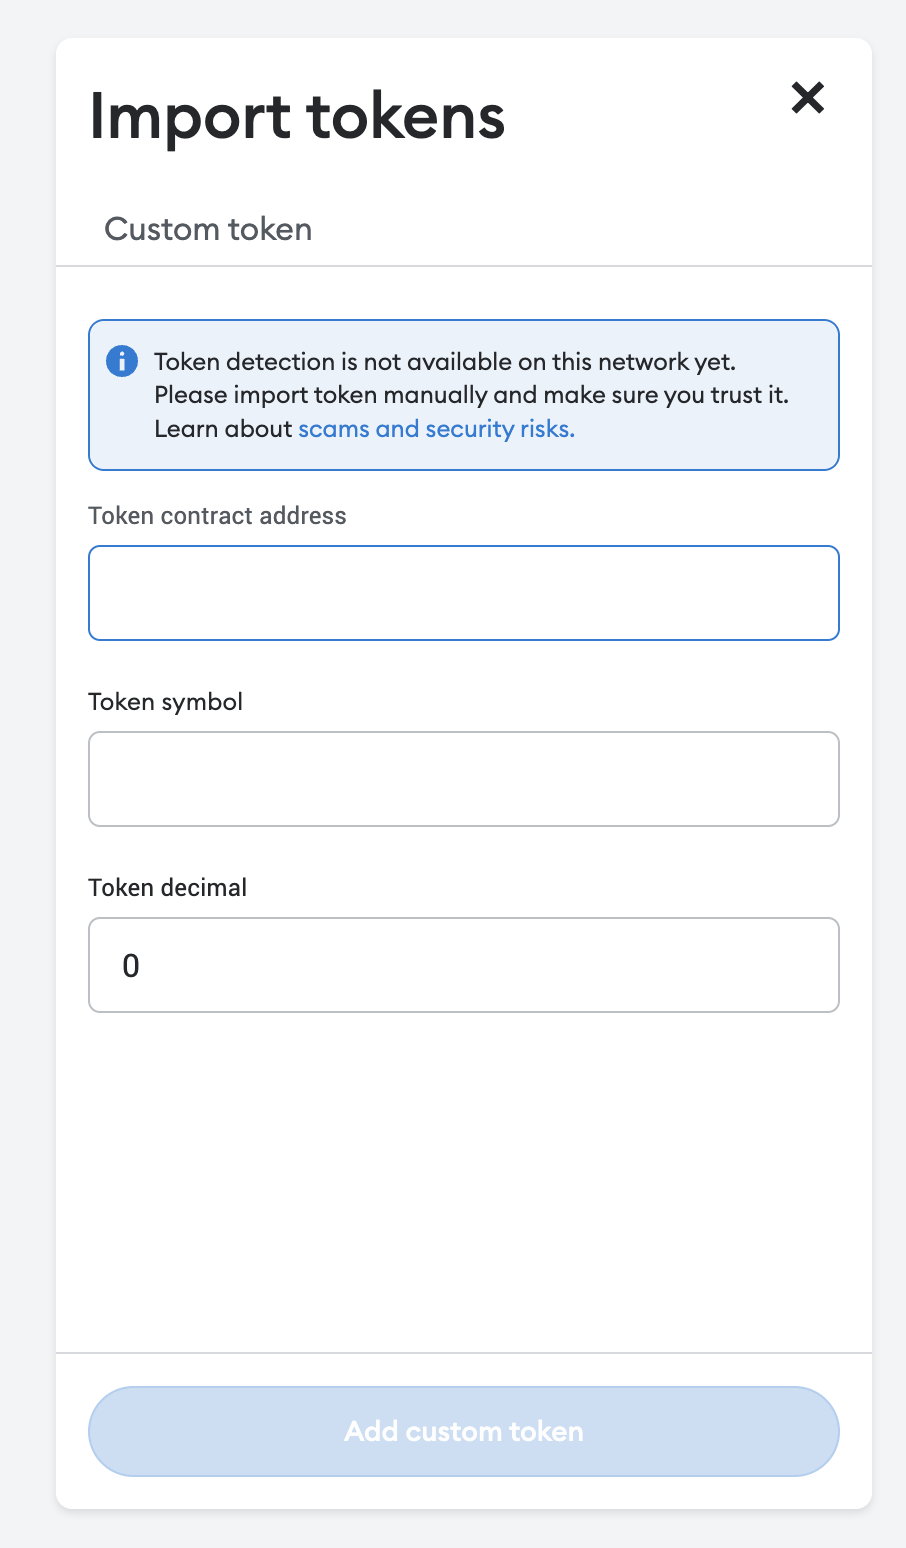
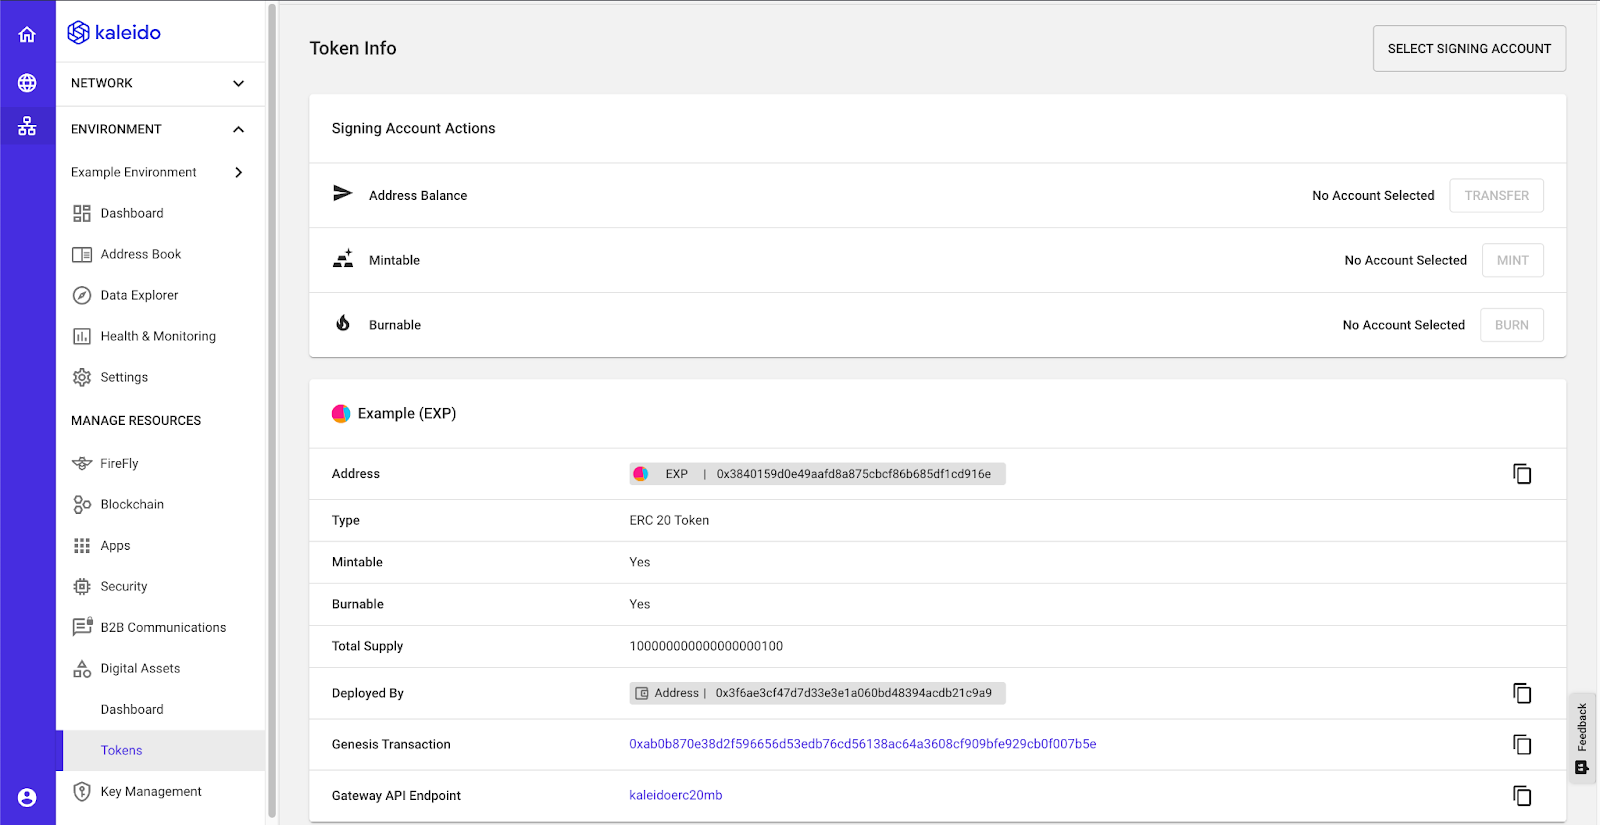
Then click “Import Tokens” which should prompt you for the token address. The token address can be found in the Token Information section of the Tokens section.
,
,
Copy this value and your token symbol and decimals should be filled in automatically. Finally, transfer the tokens to your Metamask account by copying your Metamask wallet address.
,
,
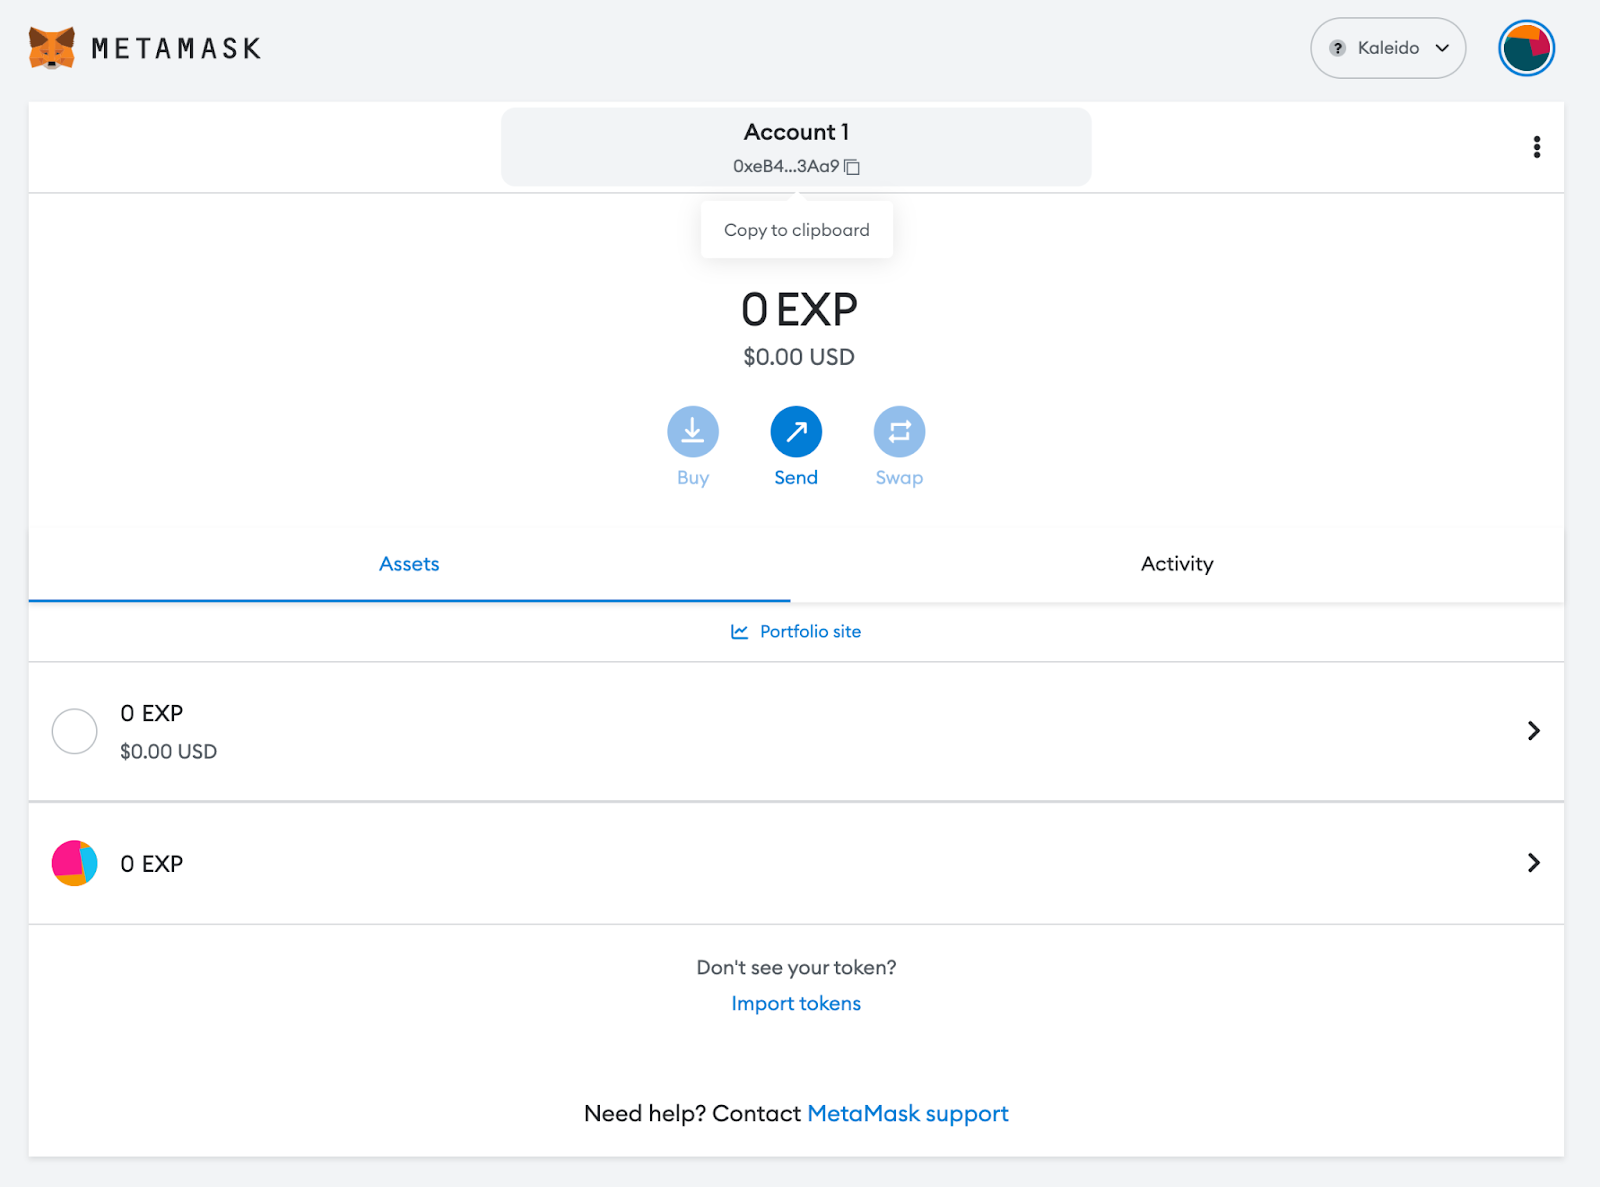
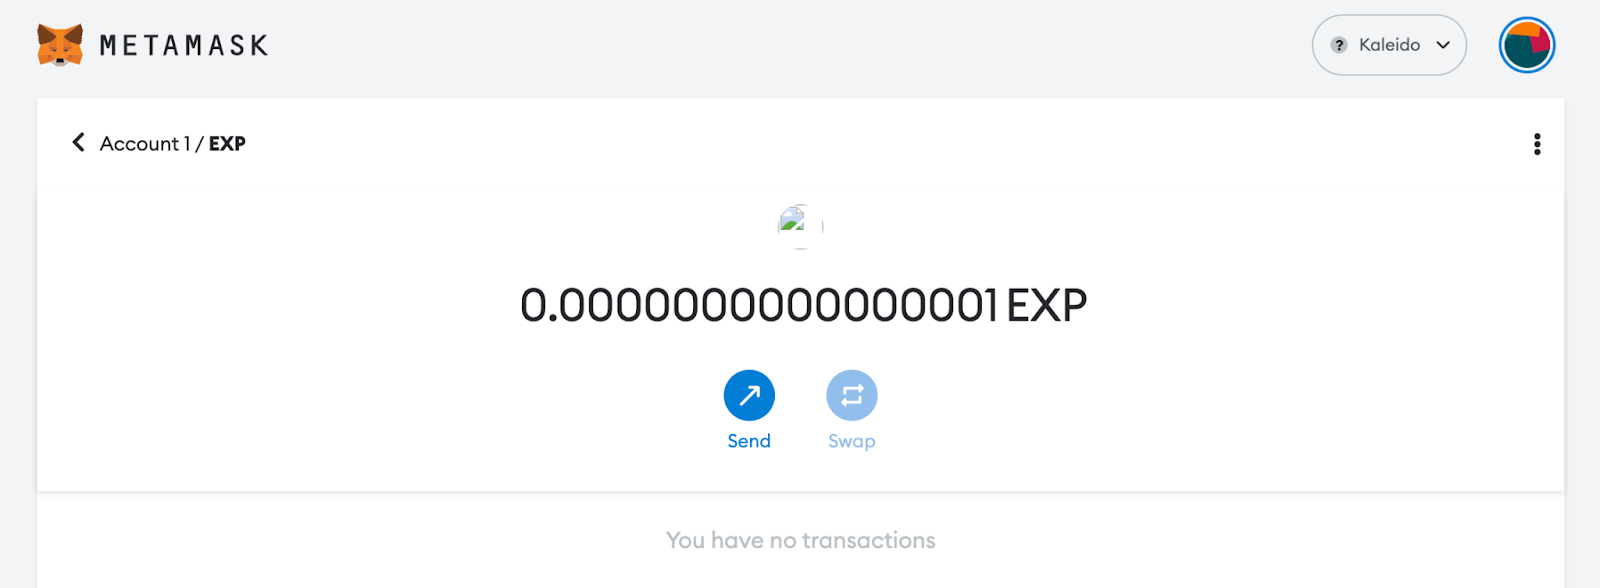
Select the amount to transfer and click Transfer. When you receive the “Transaction Successful” message, go back to your Metamask wallet.
,
,
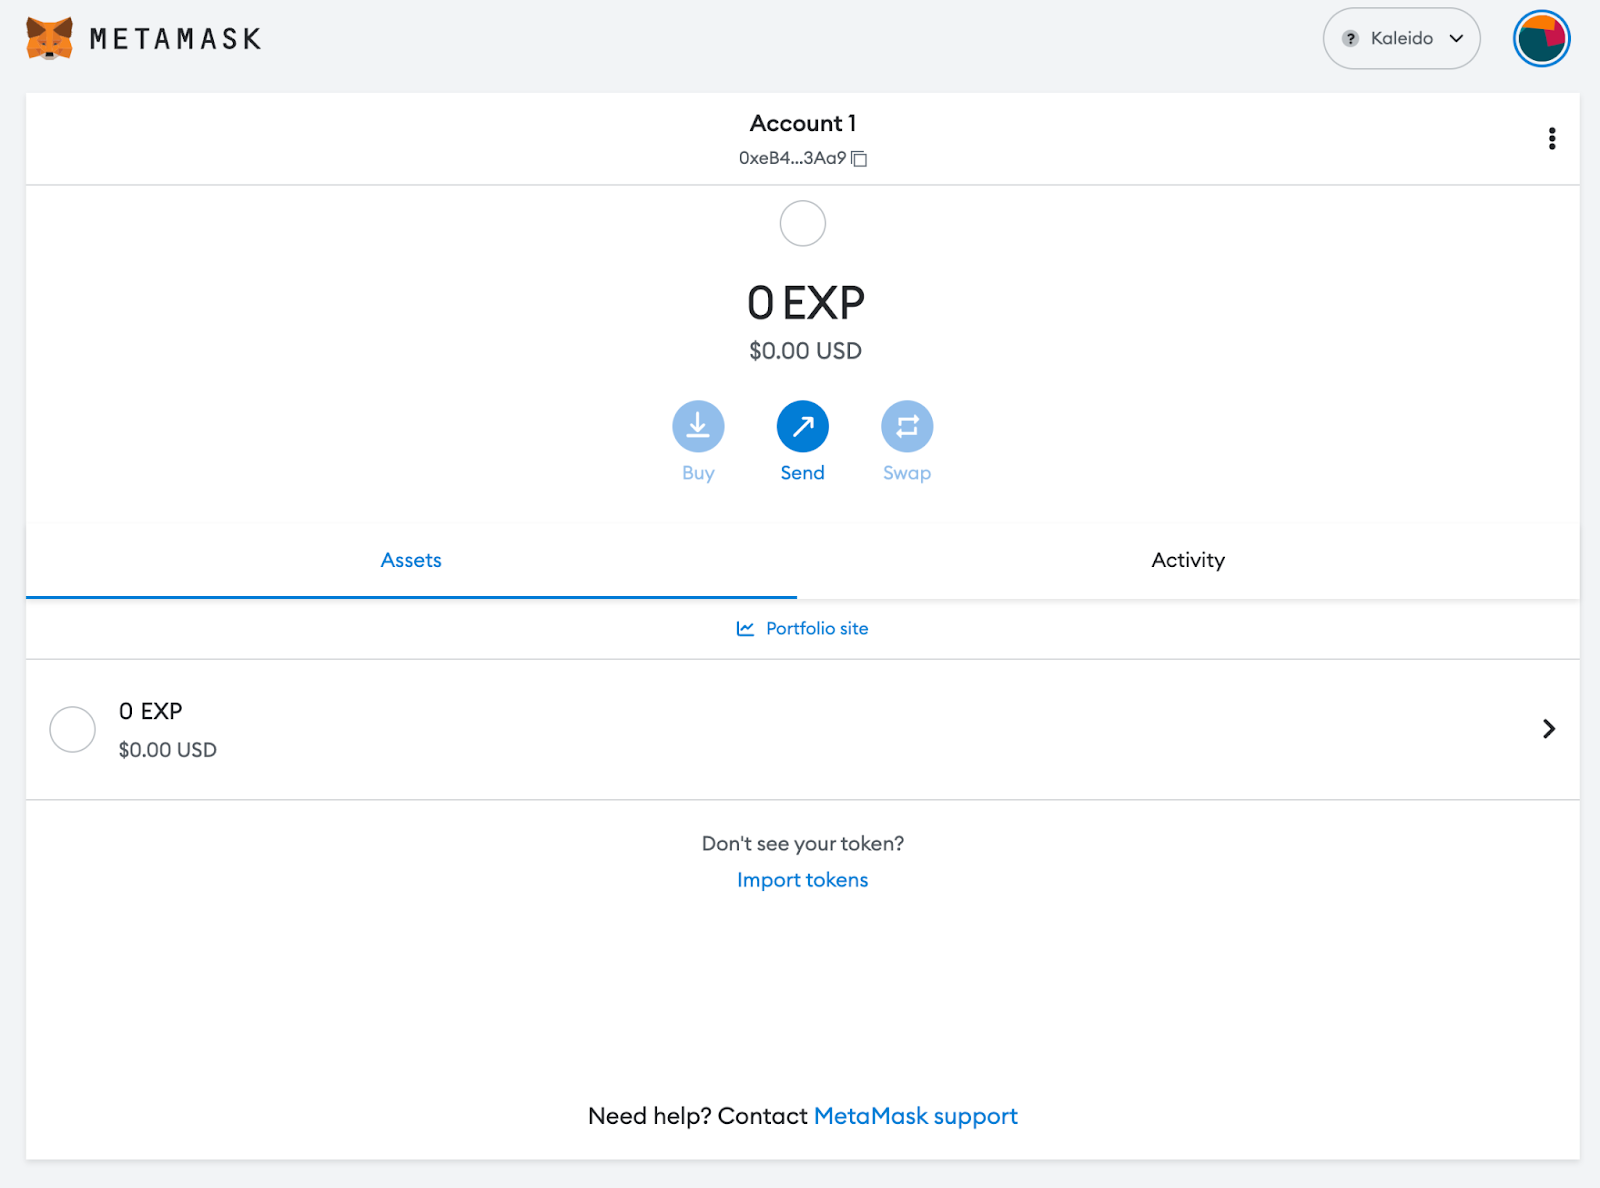
It should refresh and show your balance.
,
,
Additional support resources
Congratulations, you have successfully transferred your new ERC-20 token to your Metamask wallet! This achievement is just one of the many abilities you can explore with Kaleido. To further enhance your blockchain projects, be sure to check out Kaleido’s YouTube channel, blog posts, and documentation for more tutorials and information on using the platform.
With these resources, you can continue to expand your knowledge and skills while making the most of what Kaleido has to offer. Ready to dive deeper? Get in touch and we’ll help you take your project to the next level.
Get Started Free
With a free Kaleido account, you can log into the console, build a blockchain, and mint tokens in minutes.
Try it now
Get Started Free
With a free Kaleido account, you can log into the console, build a blockchain, and mint tokens in minutes.
Try it now
Start learning blockchain and creating business solutions with a Kaleido account today!
Create a Free Account
